|
Hello friends! It's been awhile! Trying to sum up the last year would take more space and time than I have here - I'm sure many of you can relate to that! After so many ups and downs and new challenges I'm grateful to return to this space. I've still been taking occasional work, although it's much slower now with Covid. I'm grateful to have the time to do projects for myself and my family, and also eager to start working with other clients again! This week marks a new beginning for me. I've launched a new blog called These Beautiful Days. After eight years of focusing my time online with you on my design and sewing work, this new space opens up to the rest of my life as a storyteller, mother, and friend. I believe that throughout the struggles of life, there is beauty to be found in everything. I hope this will be a window we can look through together to see our everyday lives with new eyes! I will still be accepting sewing work as my primary job and I'm so excited to see what this new year will bring! You can find my blog at thesebeautifuldays.com, and continue to find me on Instagram @hannahpantano. To old friends and new beginnings! 
0 Comments
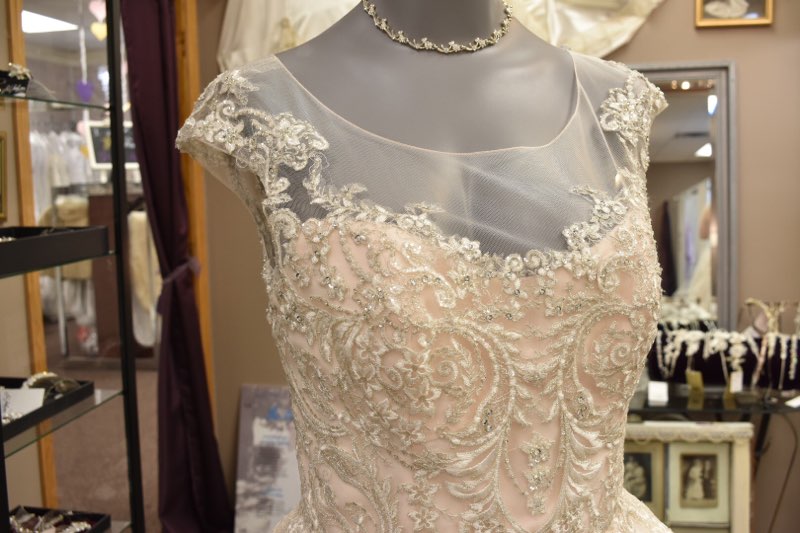
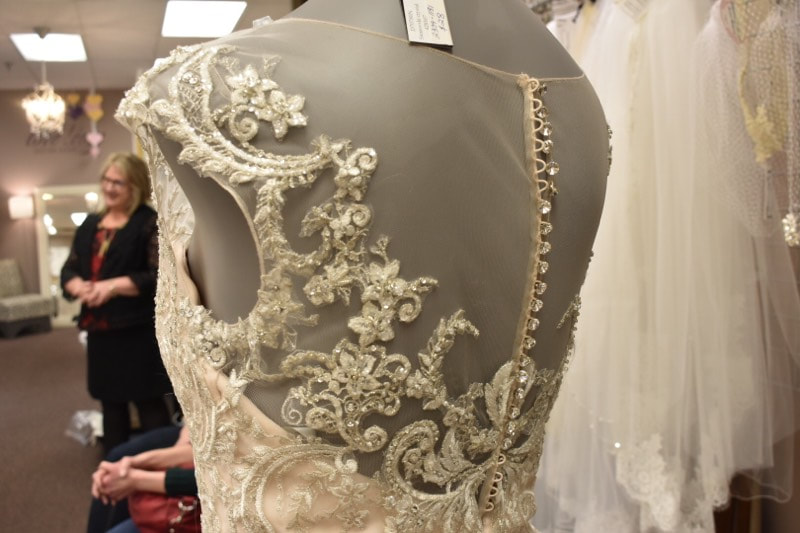
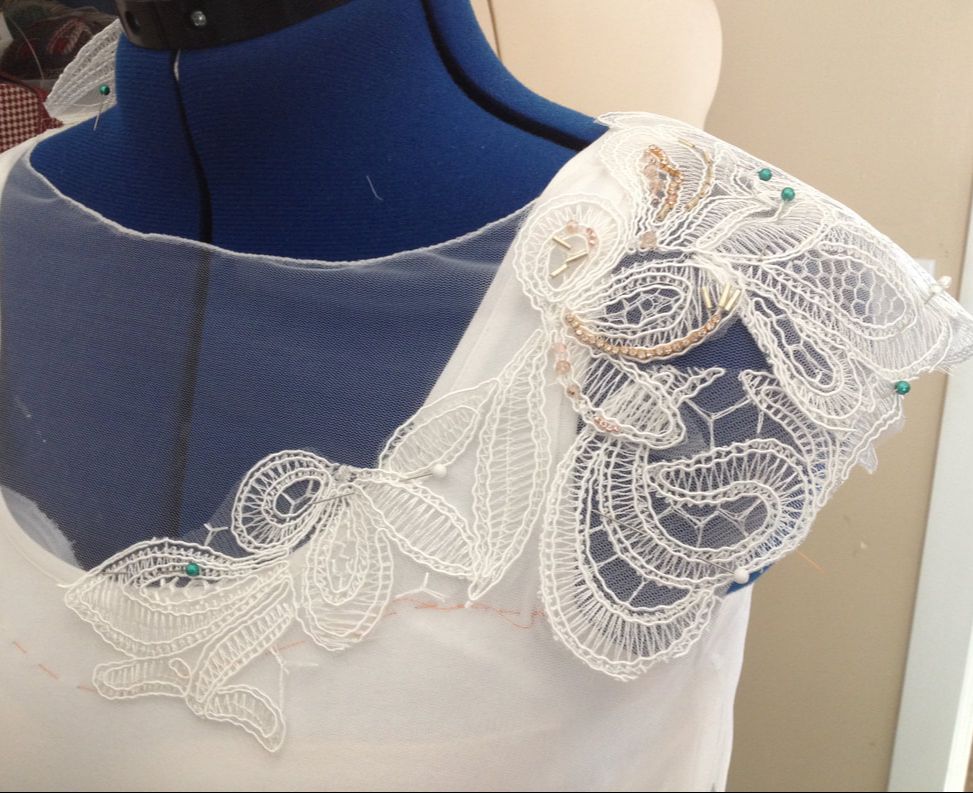
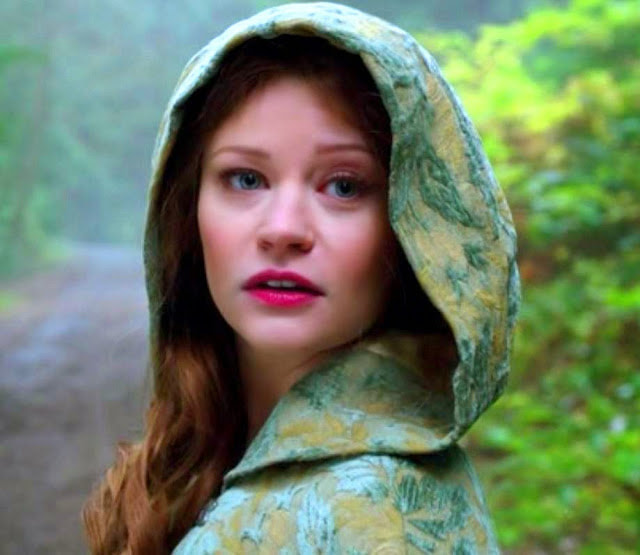
This summer, I had the privilege to create several designs for a wedding - a custom brocade coat for the groom and a beaded lace illusion to complete the bride's dress. The bride had found - almost - her dream dress at a local consignment shop: a lovely silhouette and gorgeous lace, but she had imagined finding an illusion neckline like this one:
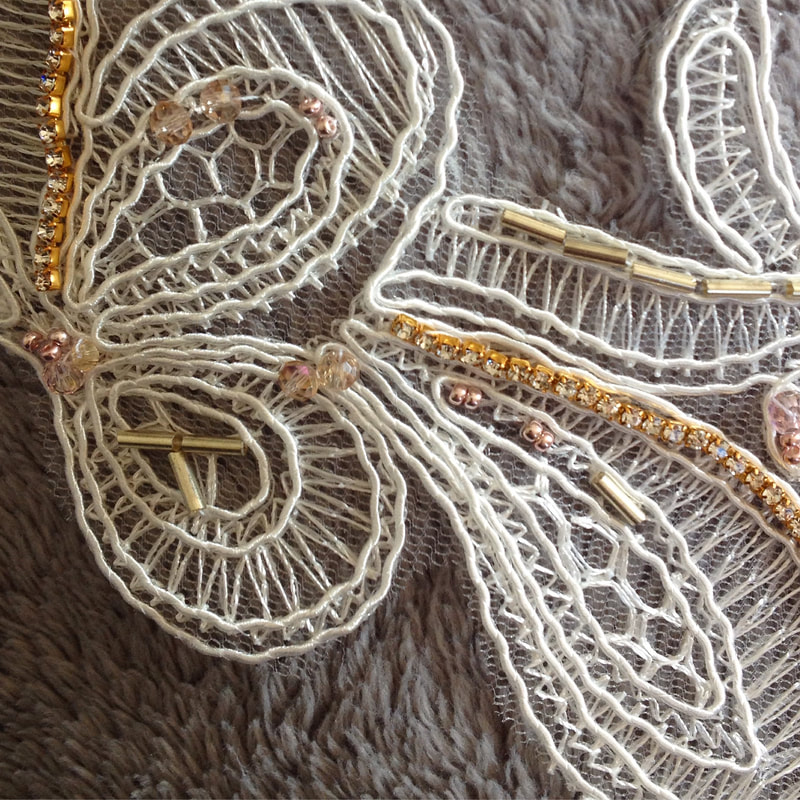
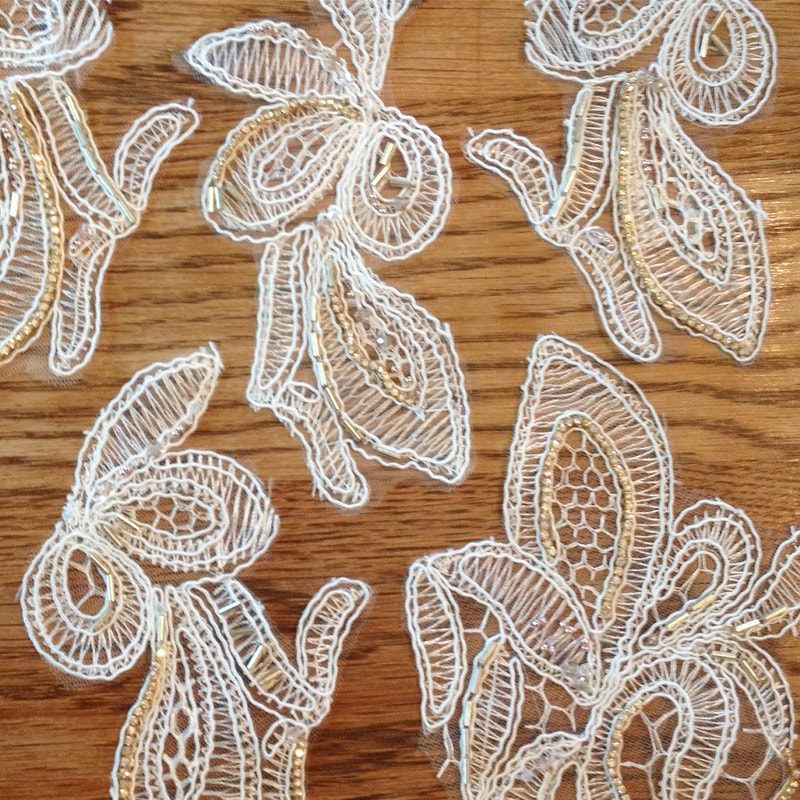
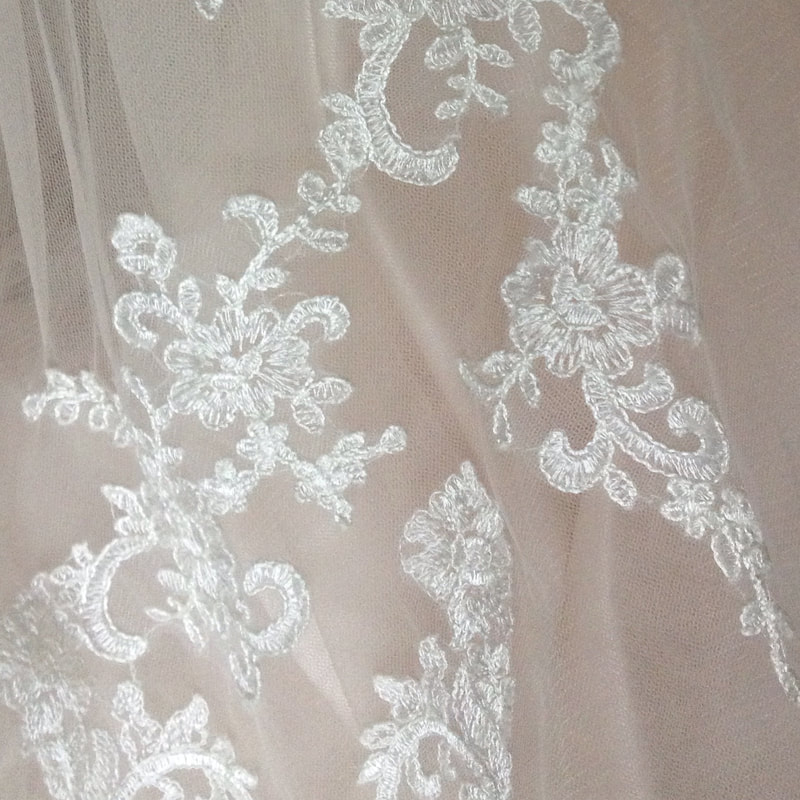
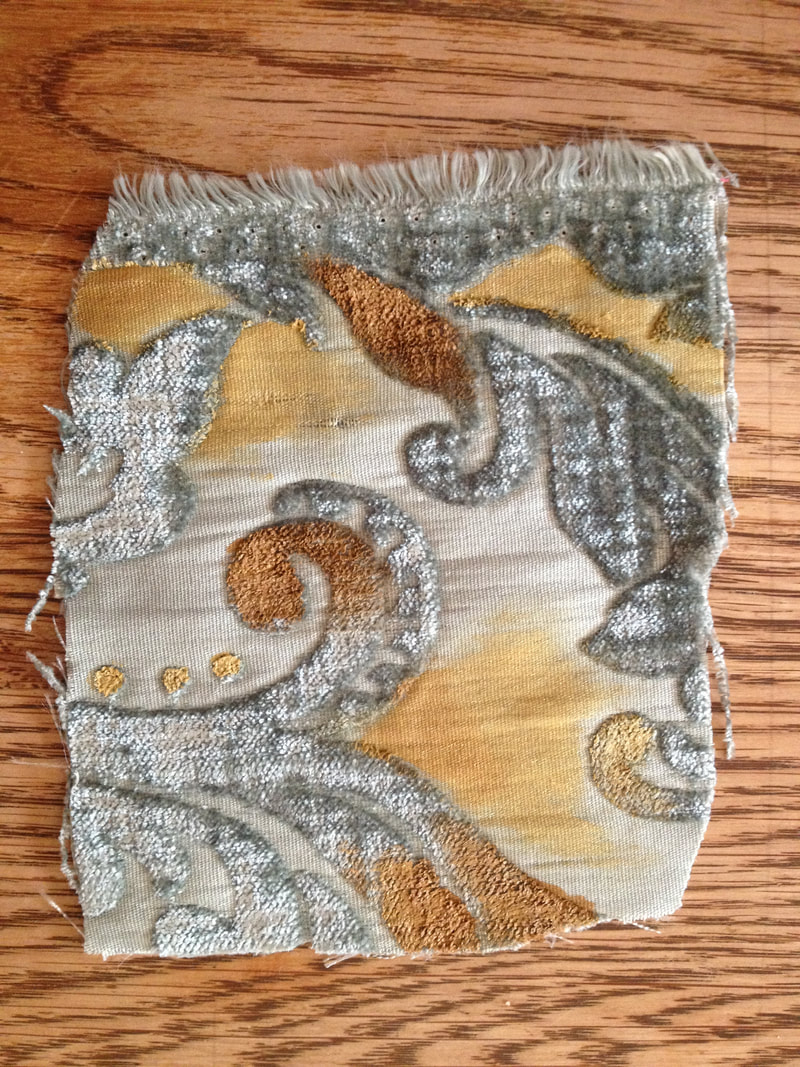
After a few alterations on the dress she found to get the perfect fit, I built a mesh and lace illusion to coordinate with the original lace design. The first step was finding lace, matching both color and motif. The first picture shows the design detail on her dress, the second the material I found to match - something with enough of a floral design that I could use pieces to create the shape she was looking for.
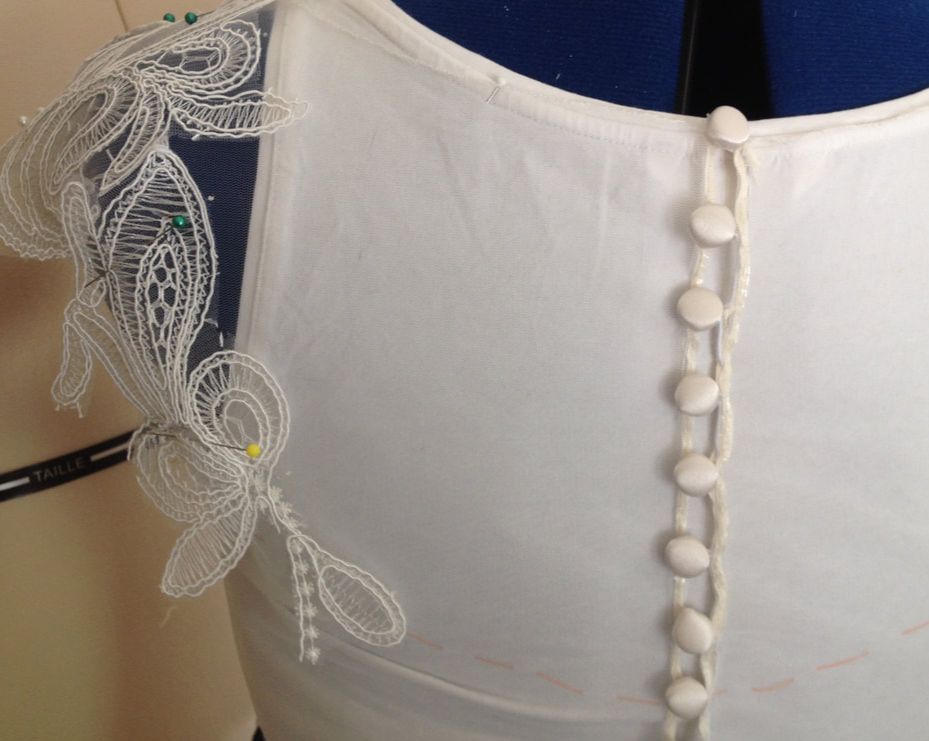
I started out by creating the base of the Illusion out of a slightly stretchy ivory mesh, with covered buttons on the back to coordinate with the buttons on the back of the dress. I used a narrow ivory ribbon to reinforce the button line. I covered my dress form and marked the neckline of the dress so I could lay out different options. The next step was trimming individual motifs from the sheet lace I found and creating the shape on the illusion. I tried different arrangements and tested them at a fitting to find the perfect layout, then moved on to beading the lace pieces. One of her accent colors for her wedding was rose gold, and the dress had a pale blush underlay, so we wanted to add hints of the rose gold in the beading to bring it together.
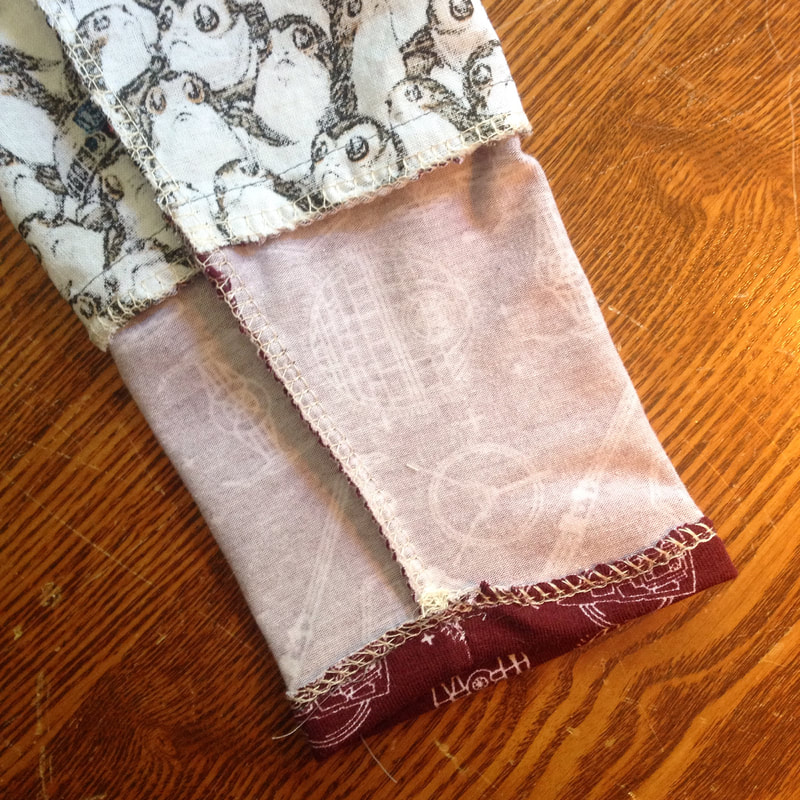
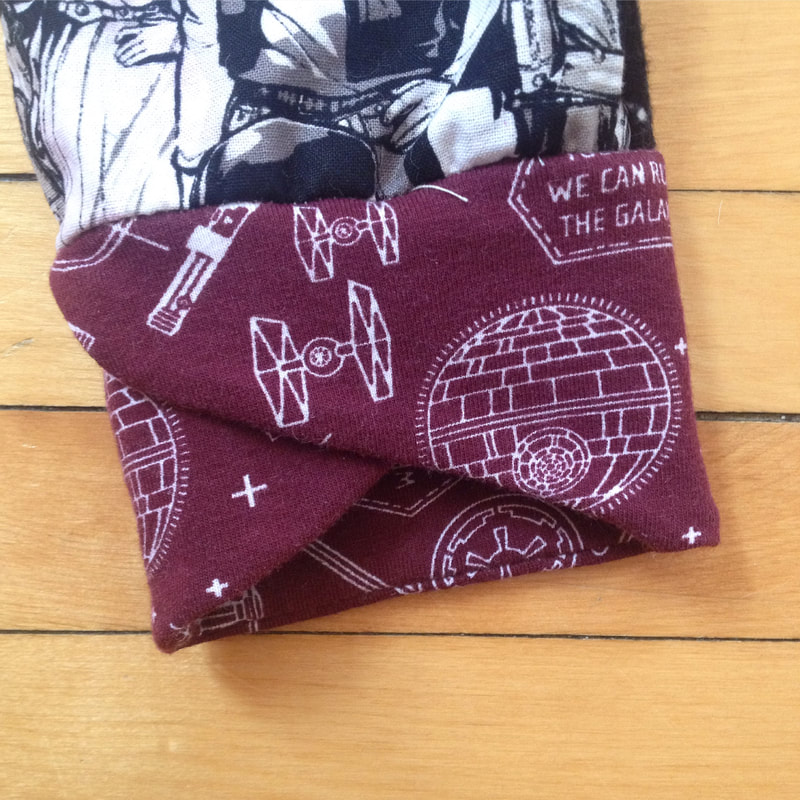
  Once the beading was done, the final step was to attach the lace pieces to the mesh, and the illusion was complete! I'll have more pictures for you soon - after a look at the groom's custom jacket! 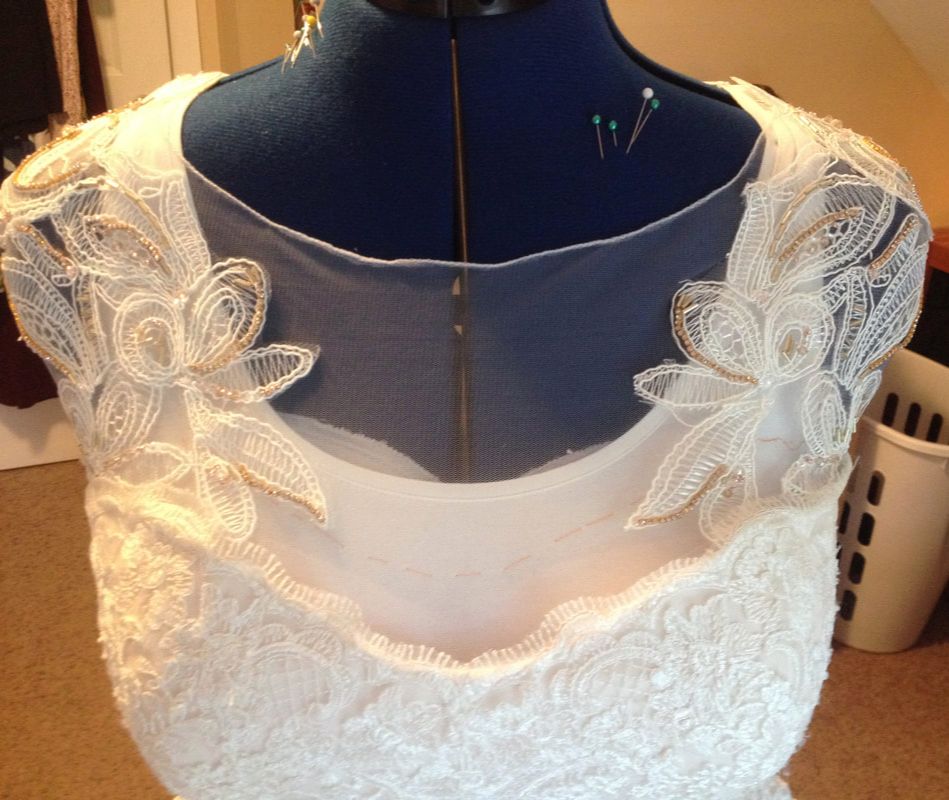 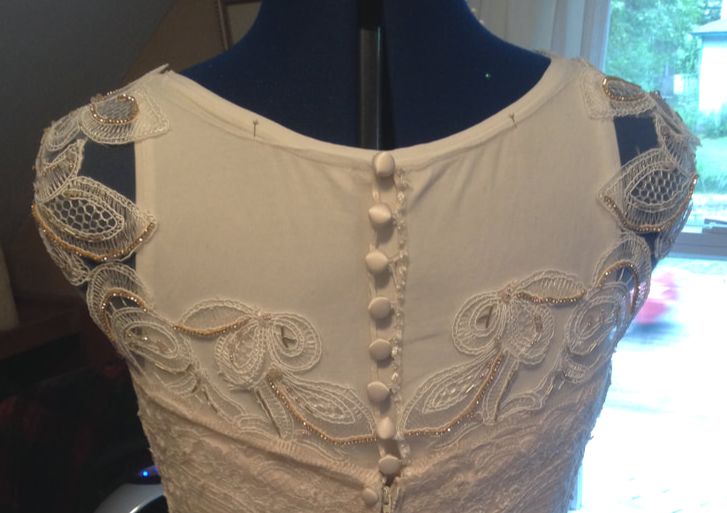 Baby is almost one year old! I wanted to make something special for the birthday - as it turns out, it will be a few special things, not just one - but I digress. First up I have a Star Wars winter romper with a matching tie top hat! I've been dropping a few detail pictures of this on instagram, and I'm so happy with how it all came together! I started with a few different character fabrics, and the idea of a patchwork look incorporating the different prints. 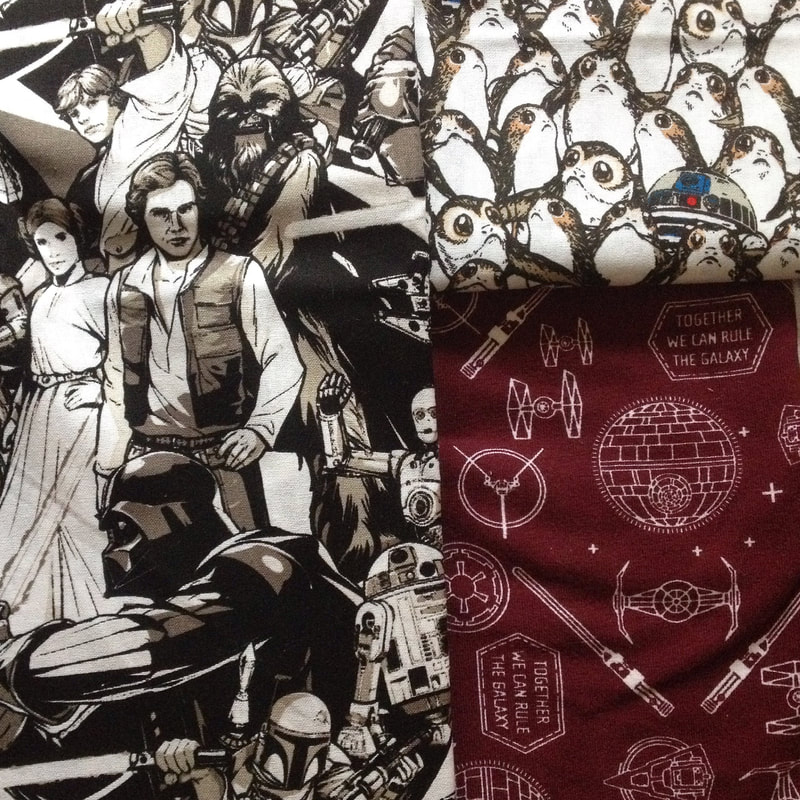 I also found a flannel with Star Wars "constellations" on it, which I decided to use for the back of the romper. I created a raglan sleeve with a contrasting high cuff - the burgundy fabric I used for the cuffs and neck was a jersey knit to give a little stretch. For the ankle cuffs, I wanted to try something a little different, so I came up with a fold-over tulip edge detail for a little bit of extra interest.
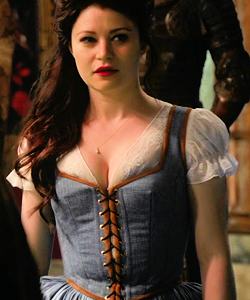
A close up look at the snap crotch - an extra wide gusset shapes the harem like legs, and the ring snaps add extra durability. I used a medium grey thread for the whole project, adding a little contrast without standing out too much. 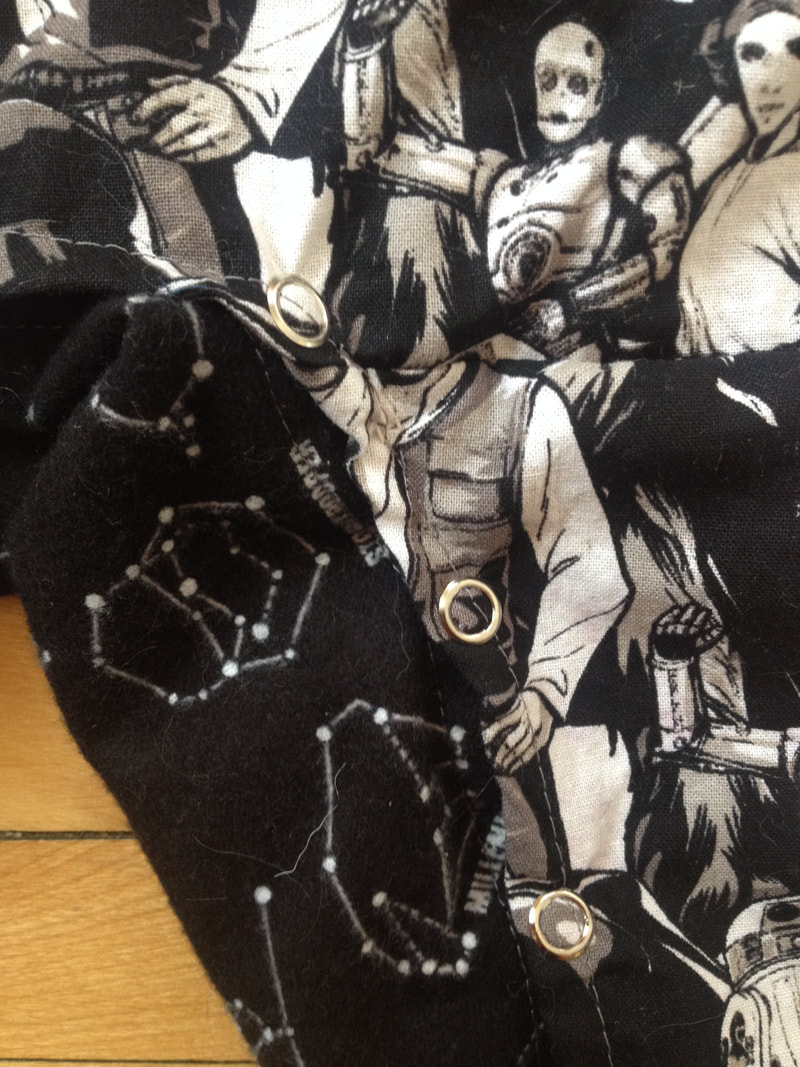 Finished neckline and sleeve. The porgs are probably my favorite print on this piece. If you look closely, you can see that I created a top closure along the front line of this sleeve. 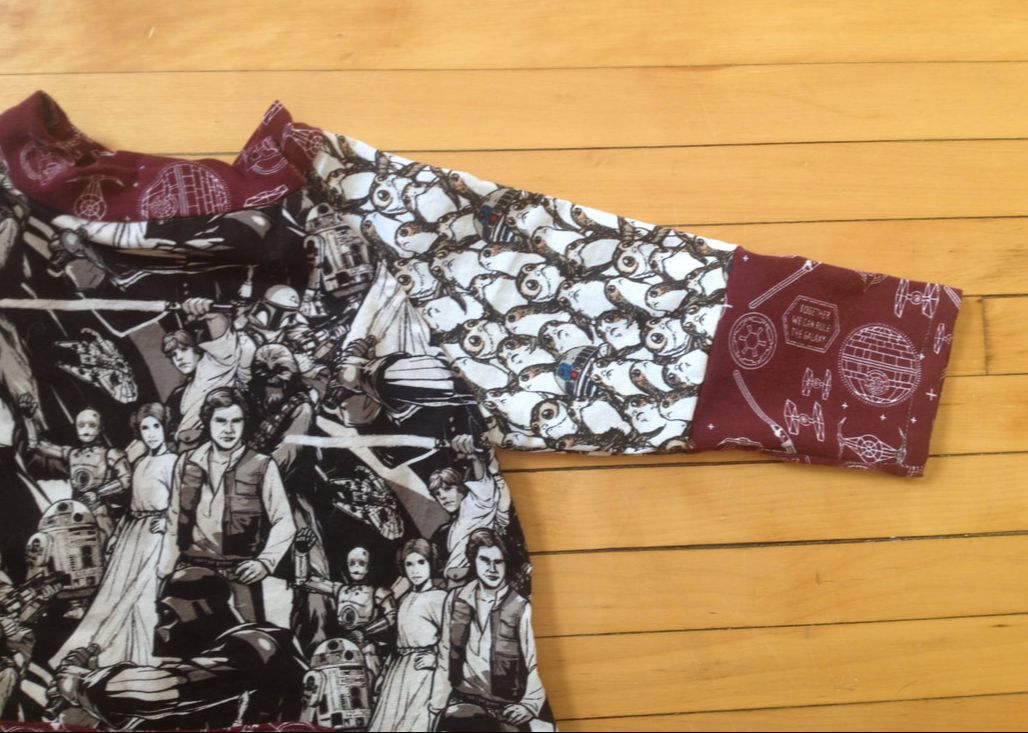 The completed front, with a kangaroo pocket! I think the different patterns work together well here, with enough of a color scheme to tie everything together. 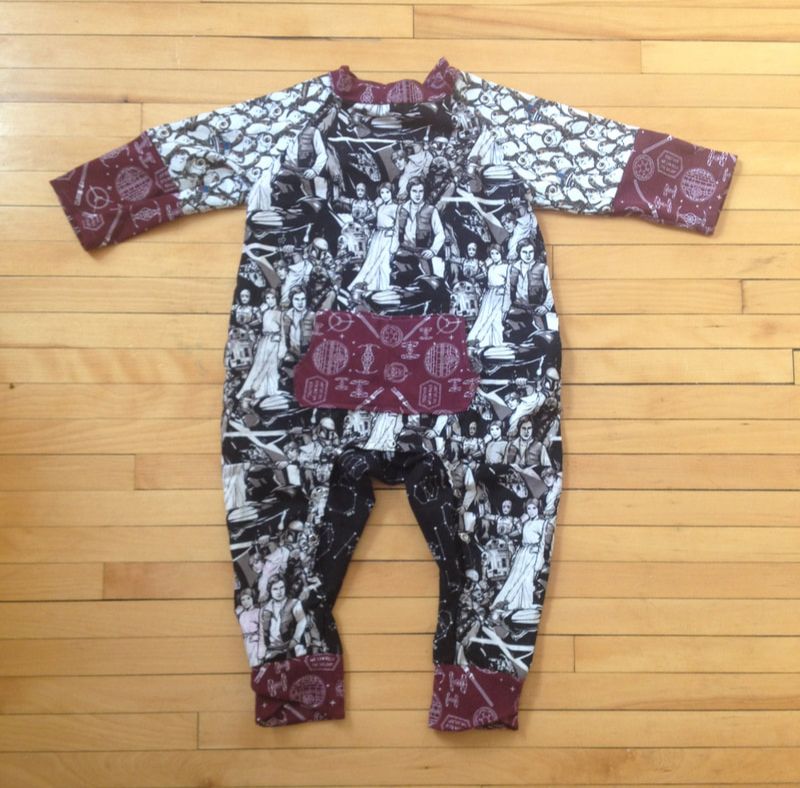 I love how the hat turned out! Definitely something we'll be wearing with other outfits as well. 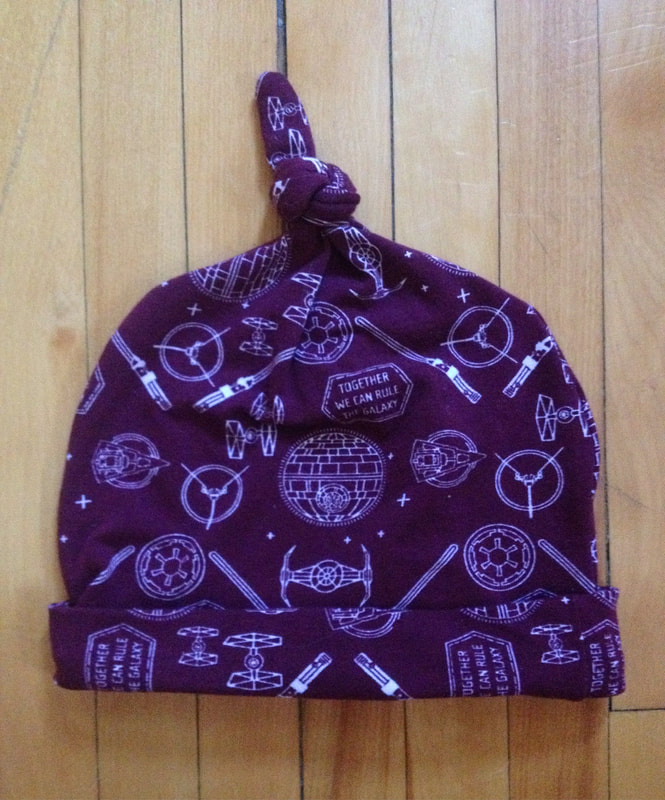 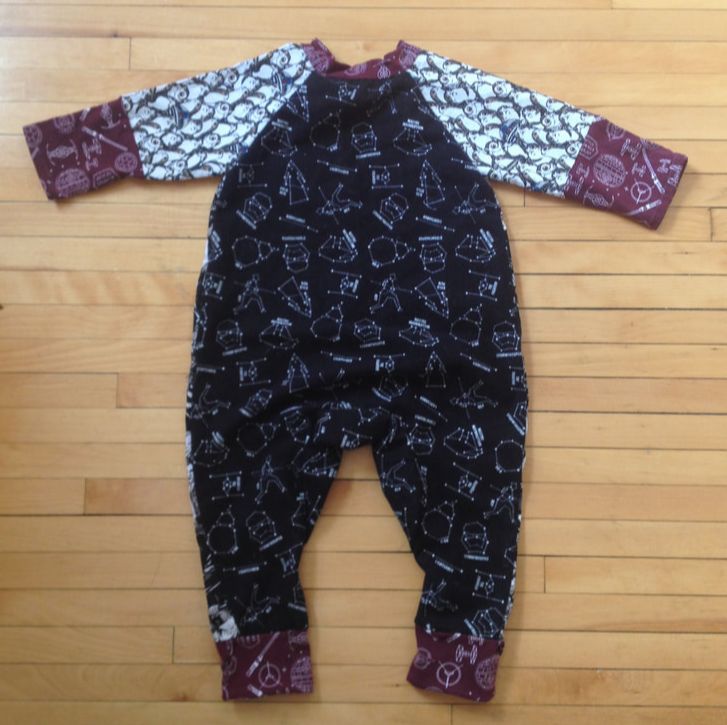 The lovely warm weather has given me a great excuse to update baby's wardrobe in between my other projects this spring. We're all about the rompers! First up, a fun and lightweight citrus print knit, with a snap crotch and easy harem pant legs.  True confessions: I love tie dye. It's one of those things that brings out my hippie streak - whether or not it's really in fashion at any given time, it's going to have a special place in my heart. I made this one out of an adult tee, again with a snap crotch. 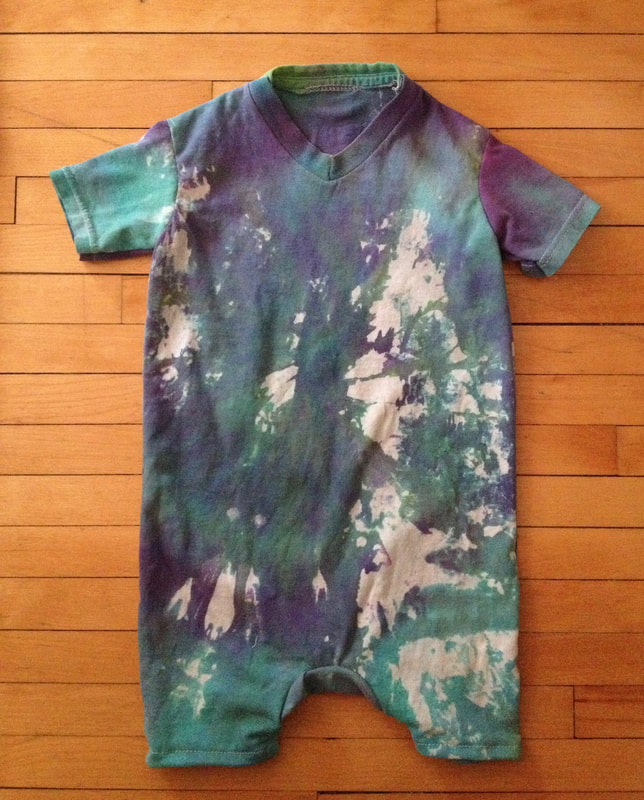 I've also been on a bit of a kick with baby shoes. My kiddo loves to move and hates feeling constrained - and is getting closer to walking every day! Finding shoes that stay on through the climbing (and kicking and pulling...) has been a challenge, and I've found that making them myself gives a better fit. It also means they can be lighter weight, without clunky soles, and at this age, we like being as close to barefoot as we can. I've always loved shoes myself, and I was intrigued when I stumbled across a tutorial for homemade, Toms-inspired baby and toddler shoes. After making a few pairs, I've drafted my own pattern, so as well as making them for my own little, I'm selling them, made to size in your choice of color and material! Contact me for more info and to place your order! Cheers! 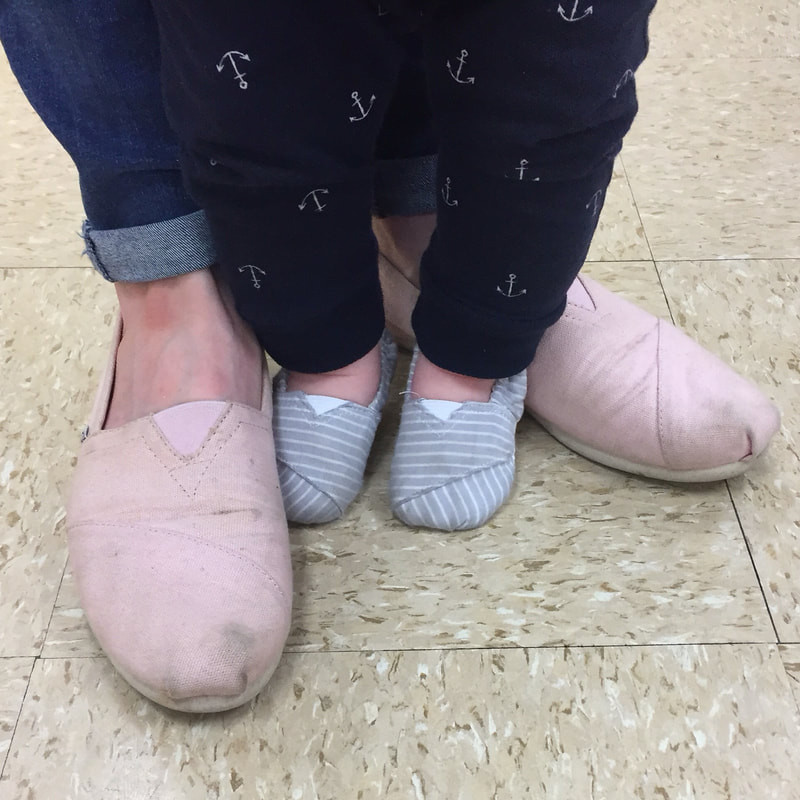  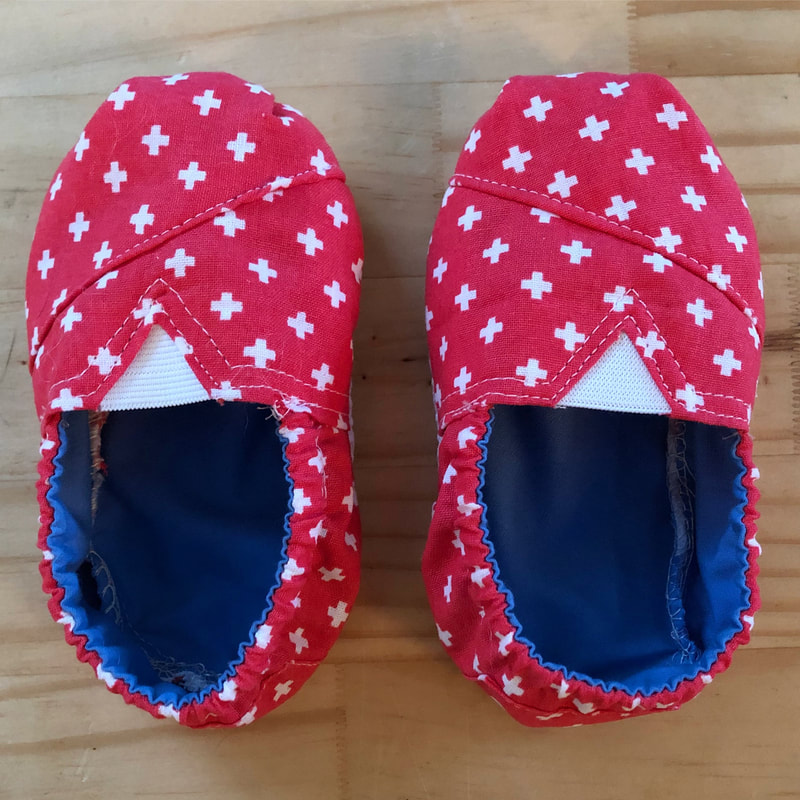 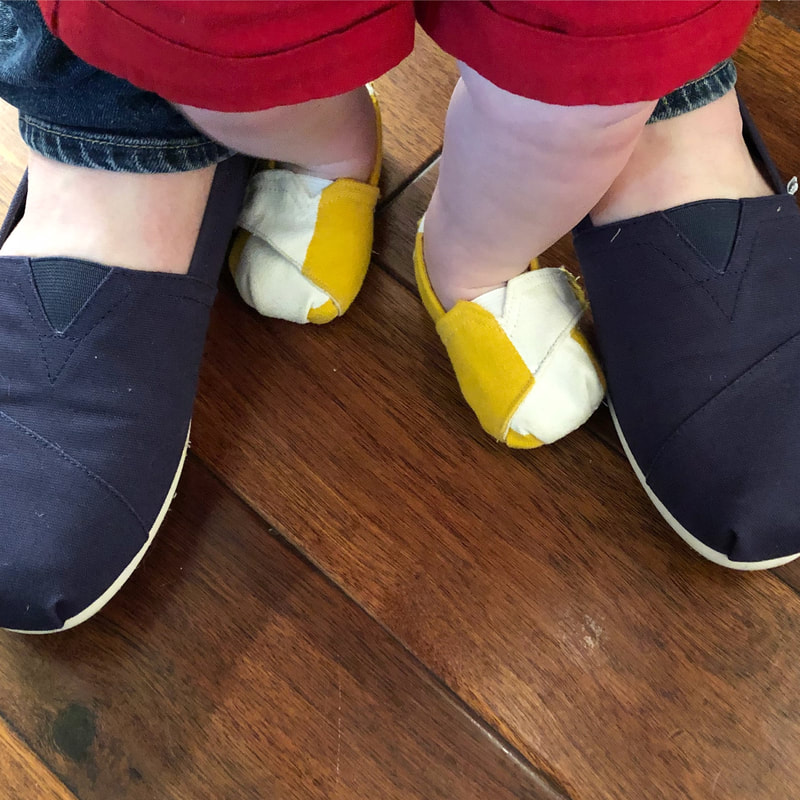 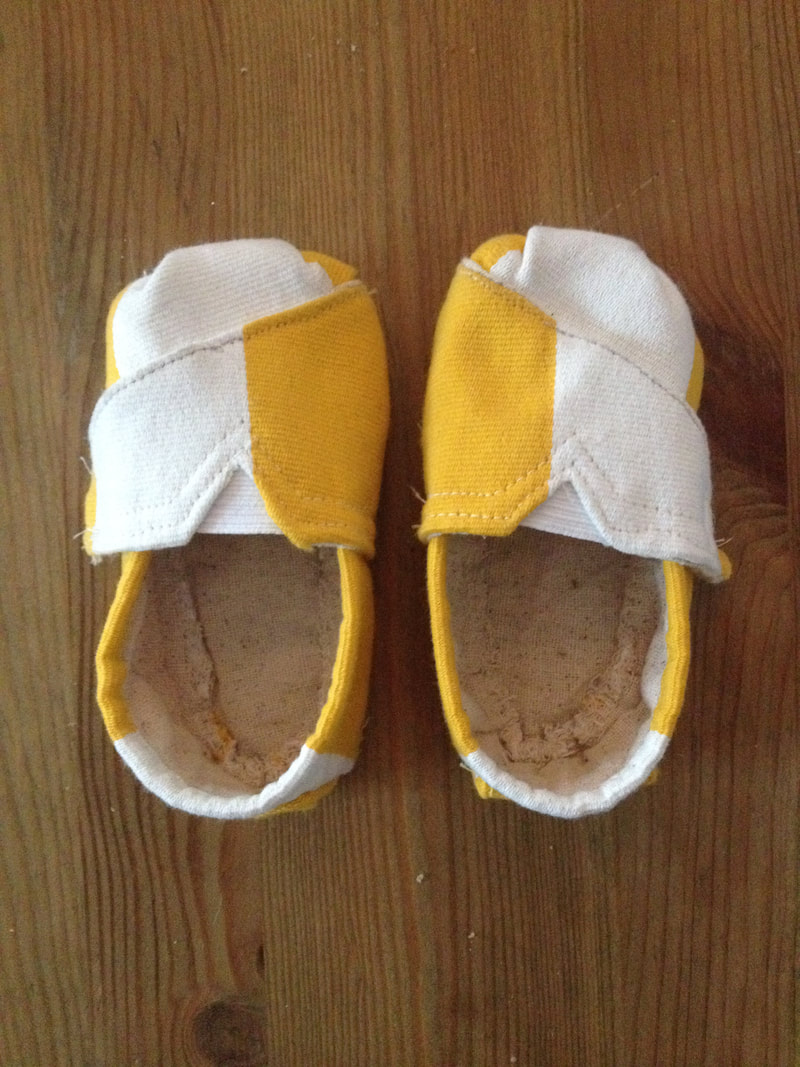 The final pieces of the costume were the blue corset and skirt. I created the pattern for the corset on a dress form, then cut the pieces from the blue cotton, interfacing, and lining. When reproducing a piece in a different size than the original, you have to pay extra attention to how the lines of the original fall on it's wearer, so you can create the correct scale for the reproduced piece, instead of just making it smaller or larger. It's one reason why plus size and petite women often have trouble finding clothing that fits correctly and looks flattering – most clothing is designed on a single size (usually slimmer and taller), and then just sized down or up, instead of being re-patterned for each size. Once I had all of the pieces sewn together for each layer, I marked out where I wanted the boning to lie and created the casings for it. I used iron on interfacing to reinforce the outer layer of cotton. Since the boning in the original appeared to lie under seam lines, I simply used the seam allowance to sew the casing, and slid the boning from it's cotton cover directly inside. It's also important to add a small cover on each end of the boning to protect it from pushing through your material during wear and tear. On this corset, the binding around the edge adds another layer of protection.
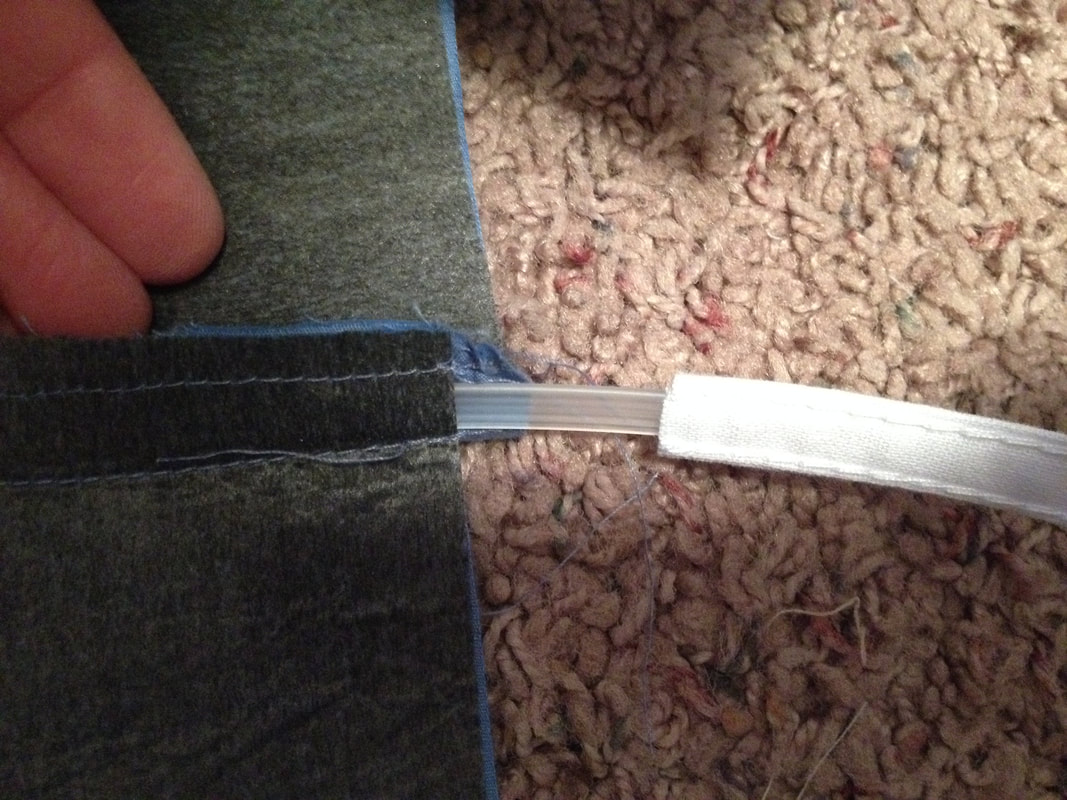
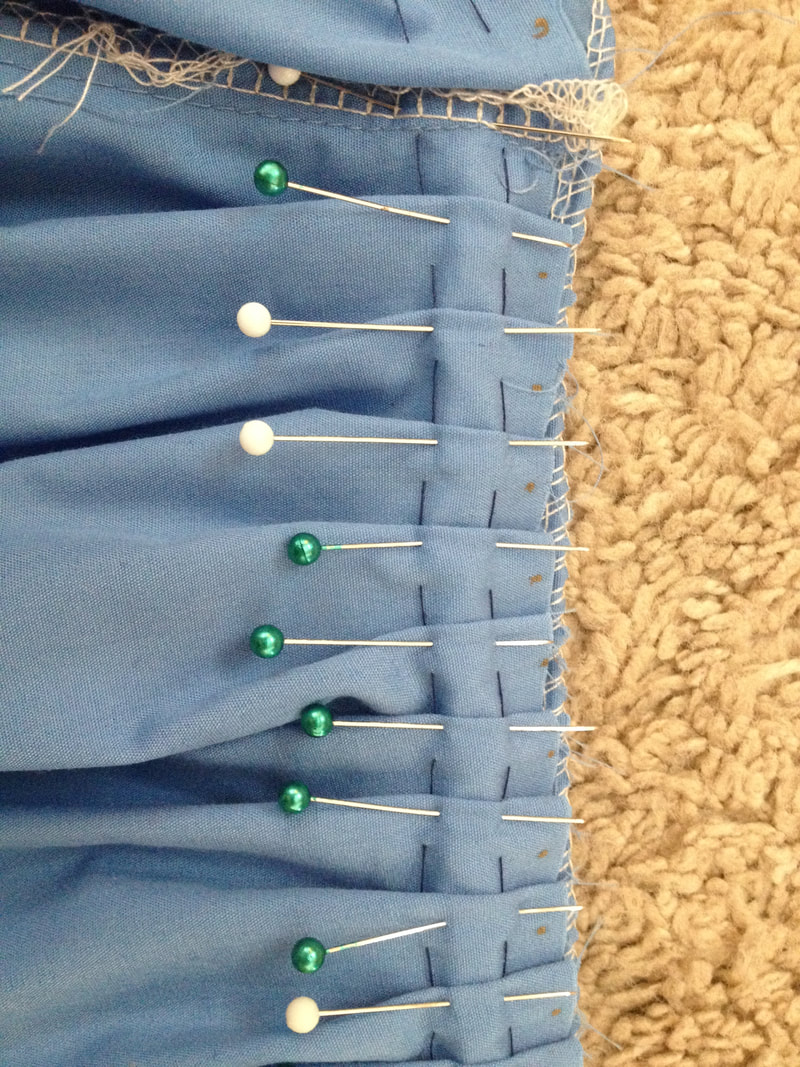
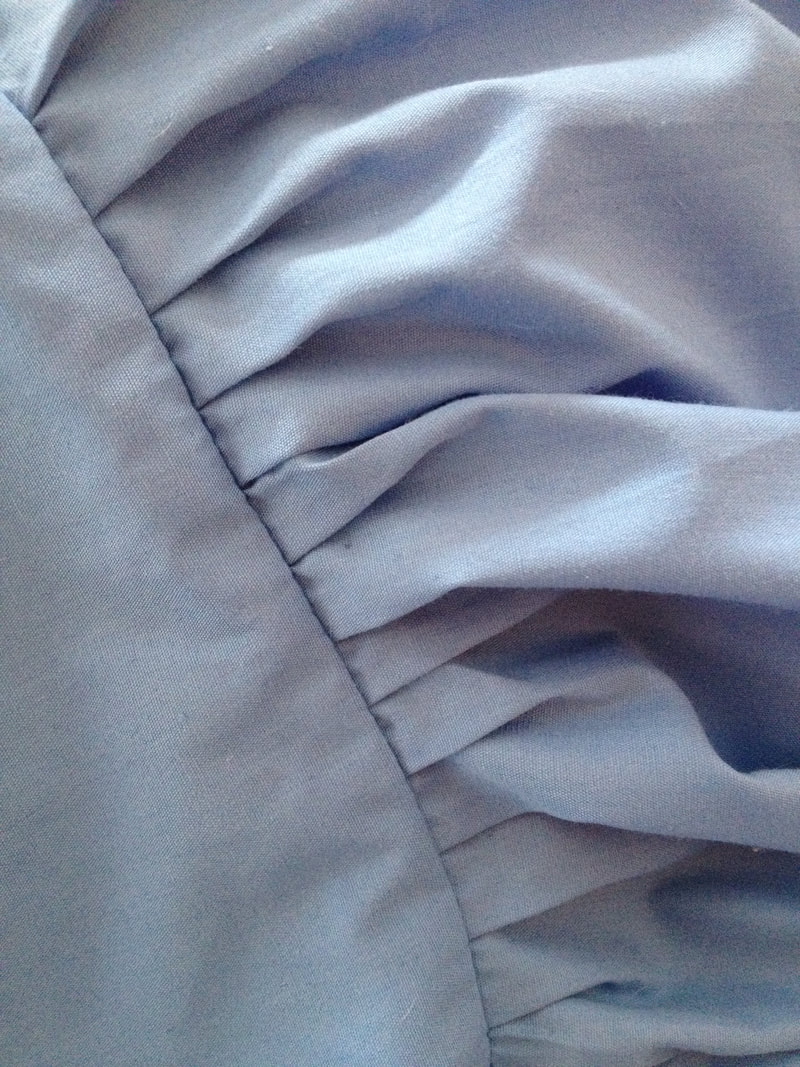
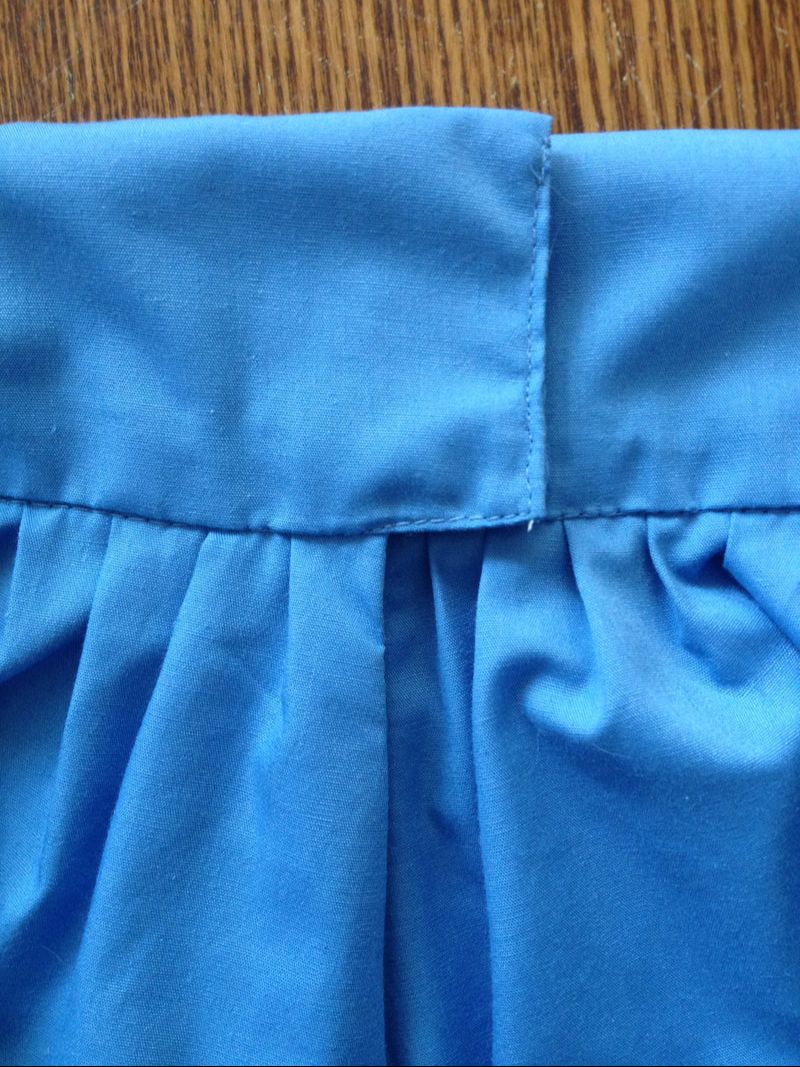
I stitched the layers of the corset together, then added the brown binding. The final step was to install the grommets and lacing! 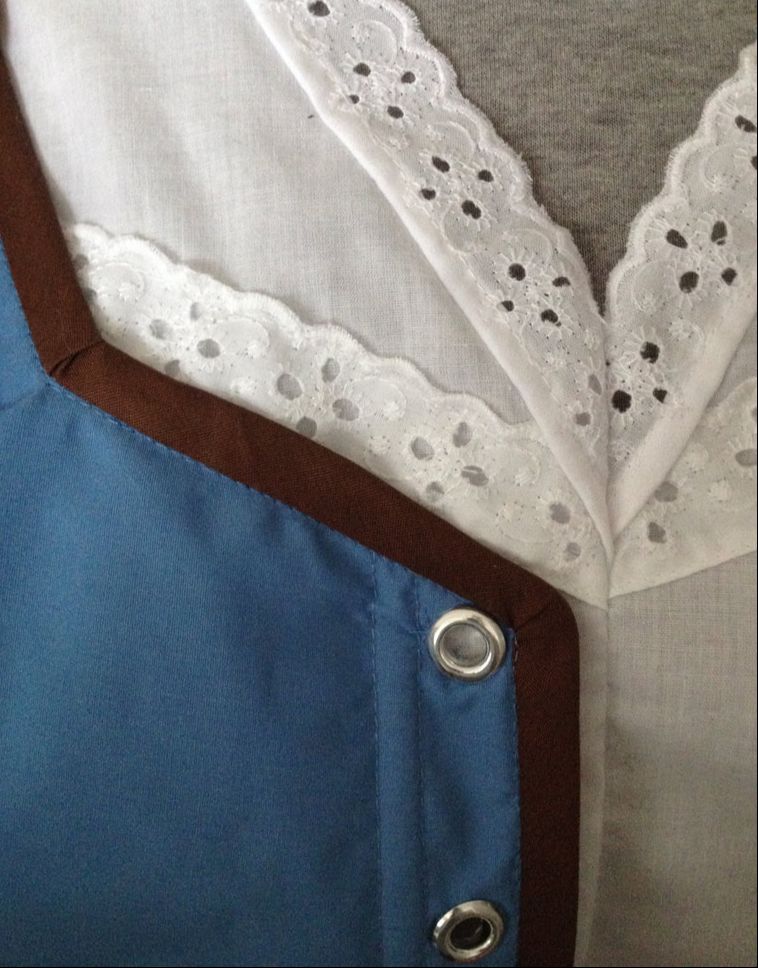 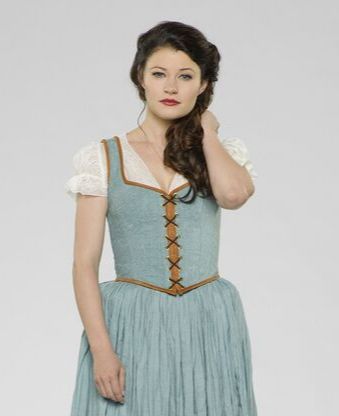 One interesting detail on the skirt of this costume that I haven't often seen in reproductions is the pleating around the waist. Once I had the skirt gores cut out and seamed together, I marked out my pleat lengths along the waistline and pinned each in place before sewing it into the waistband. I made a little bit wider of a waistband for this skirt to ensure plenty of overlap between the skirt and corset, so the top of the corset would just cover the pleated seam.
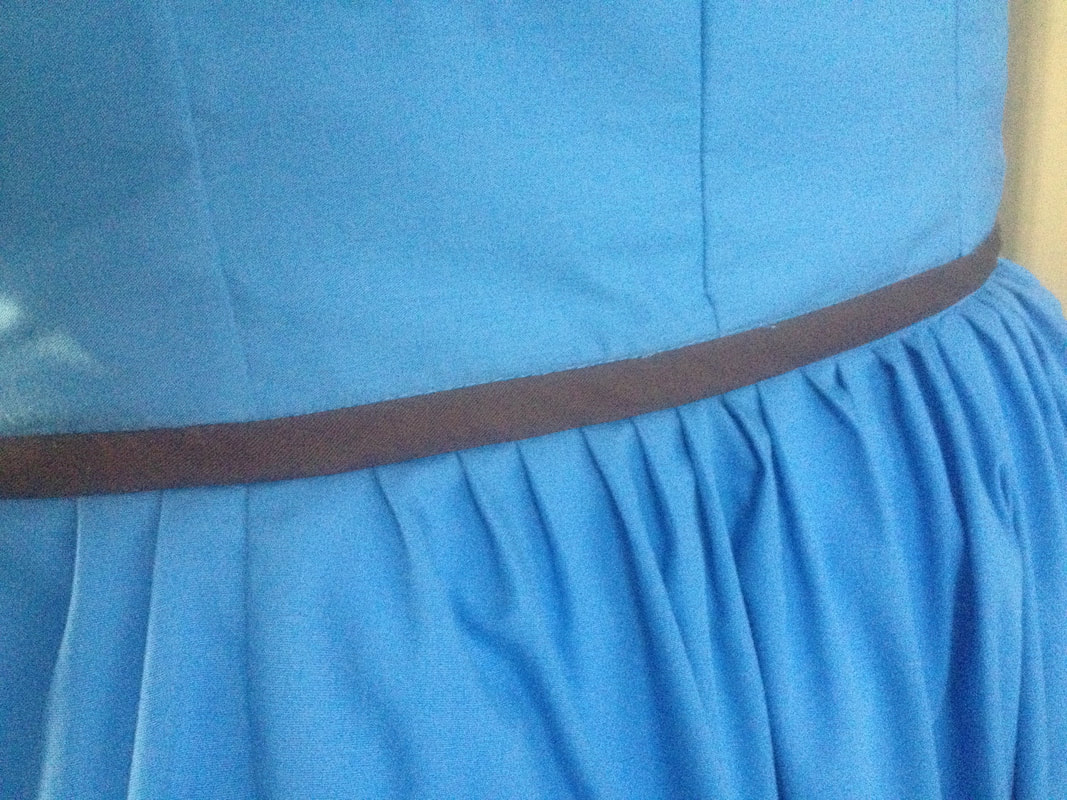 I finished the skirt with a placket and closures, and added a series of hook and eyes between the skirt and corset so everything would stay lined up during wear.
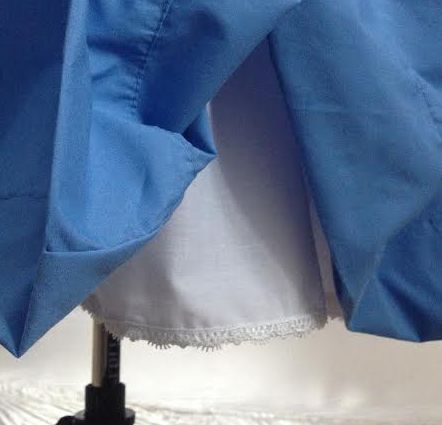
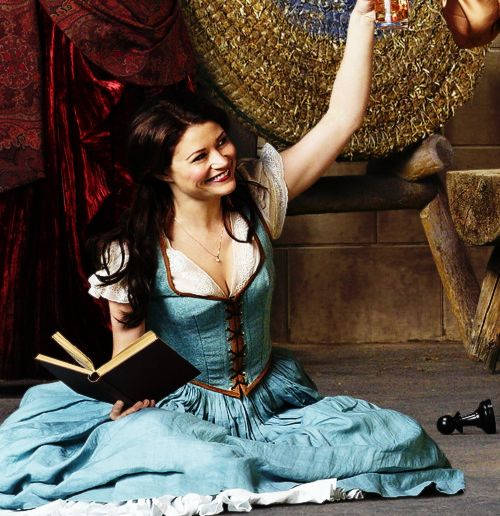
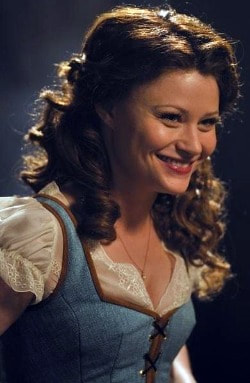
And Belle's blue dress and traveling cloak are complete! 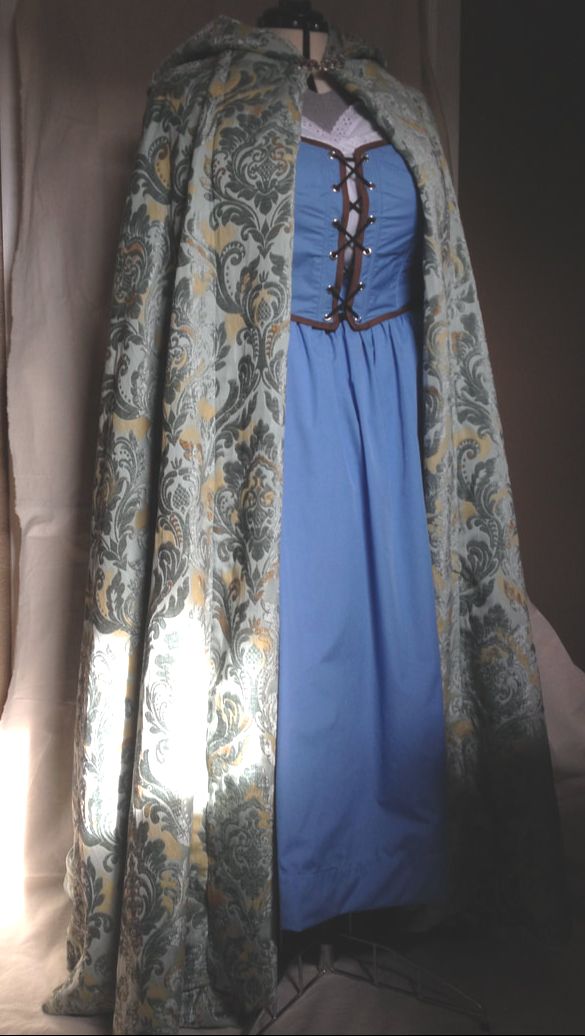 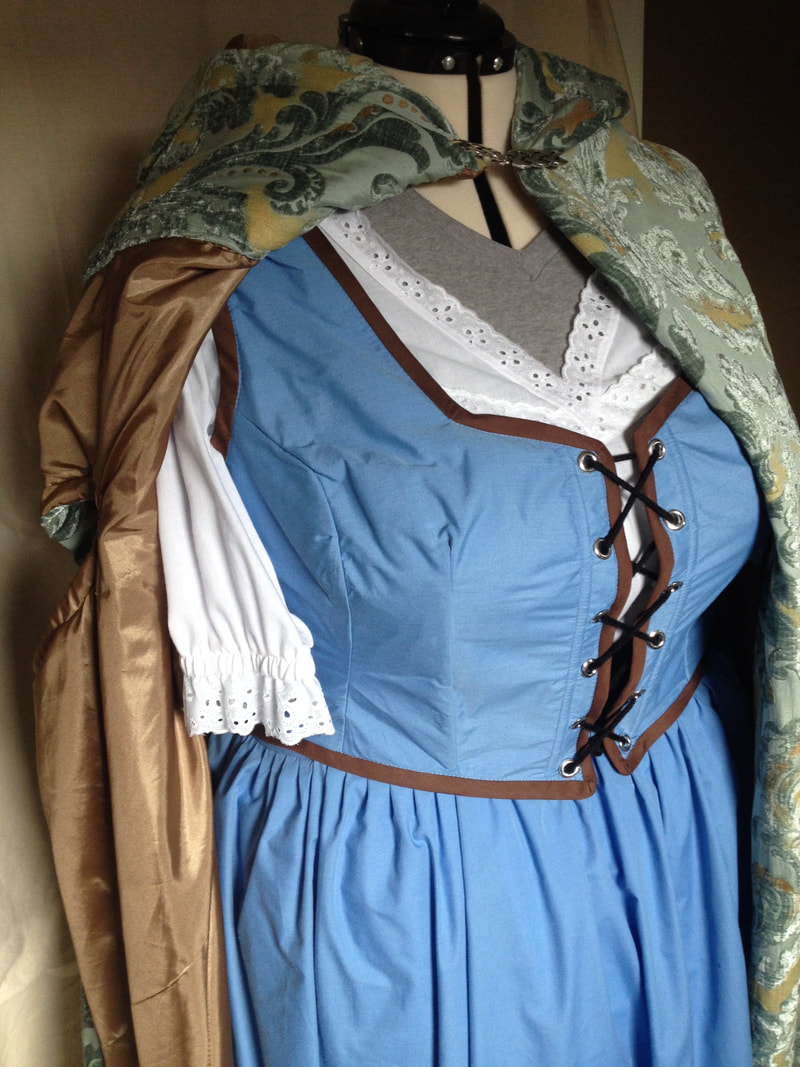 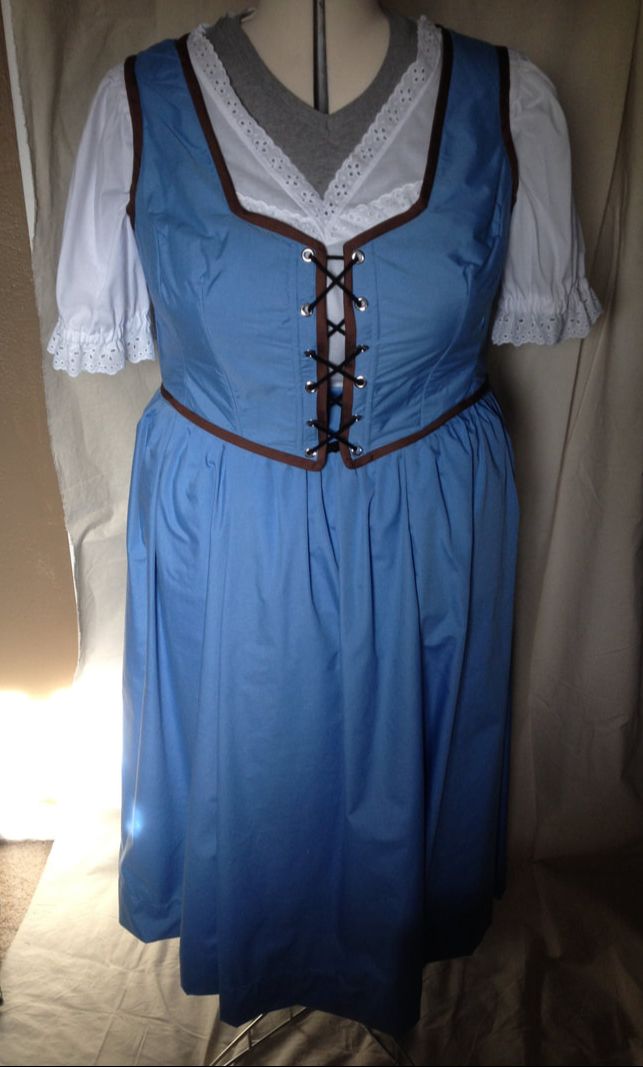 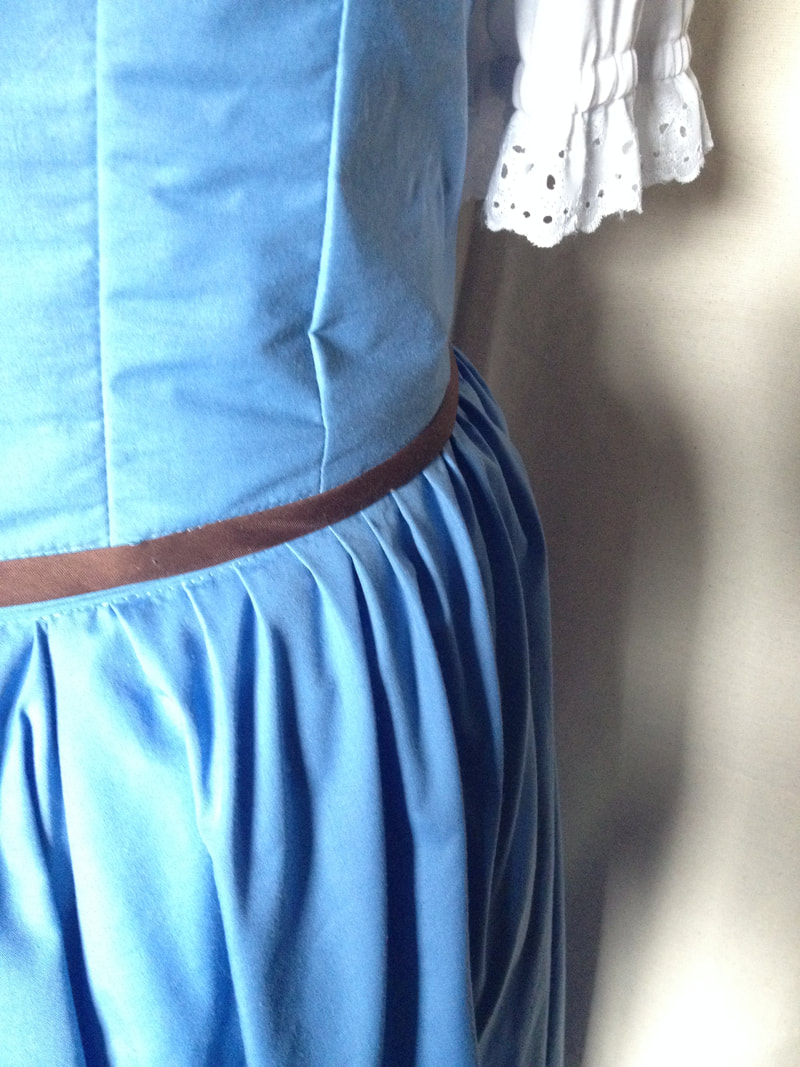 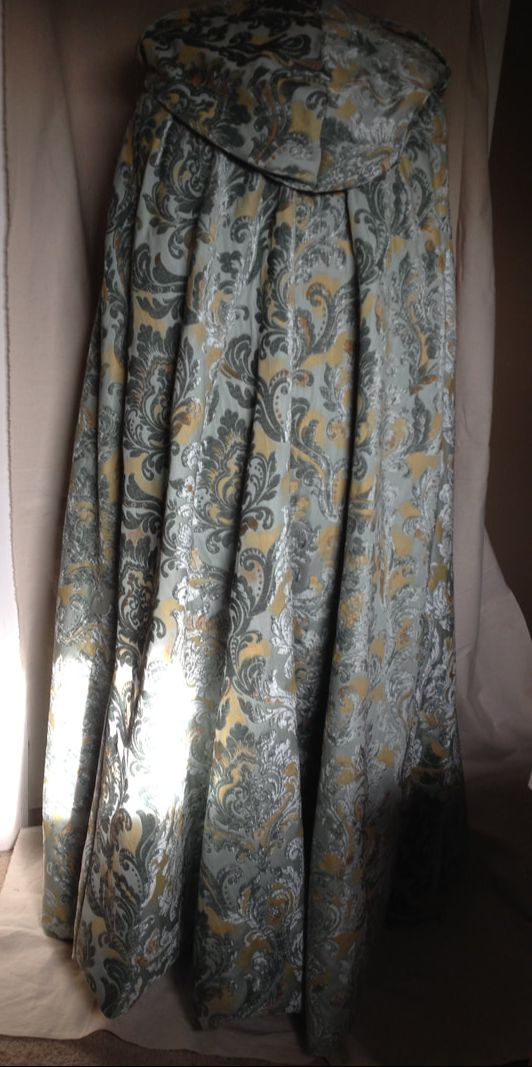 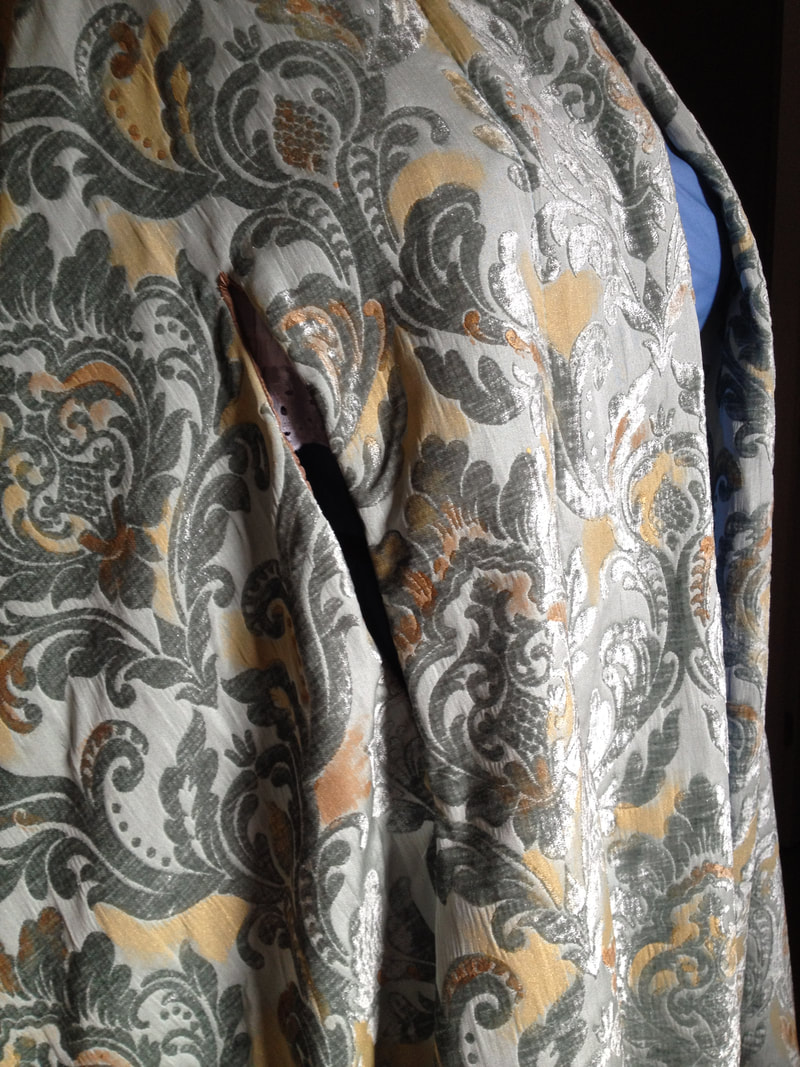 Once I finished Belle's traveling cloak - catch the blog post here! - I started working on the body of the costume: Belle's blue dress. Once Upon a Time reimagined this iconic costume for Emilie de Revin, and I've worked on several versions of it over the last few years. For this costume, we wanted to make a reproduction that was as similar as possible to the original, and cool and comfortable for wearing at a convention. I started with the base layer - a white lacy blouse and petticoat. You can get just glimpses of both pieces underneath the blue corset and skirt.
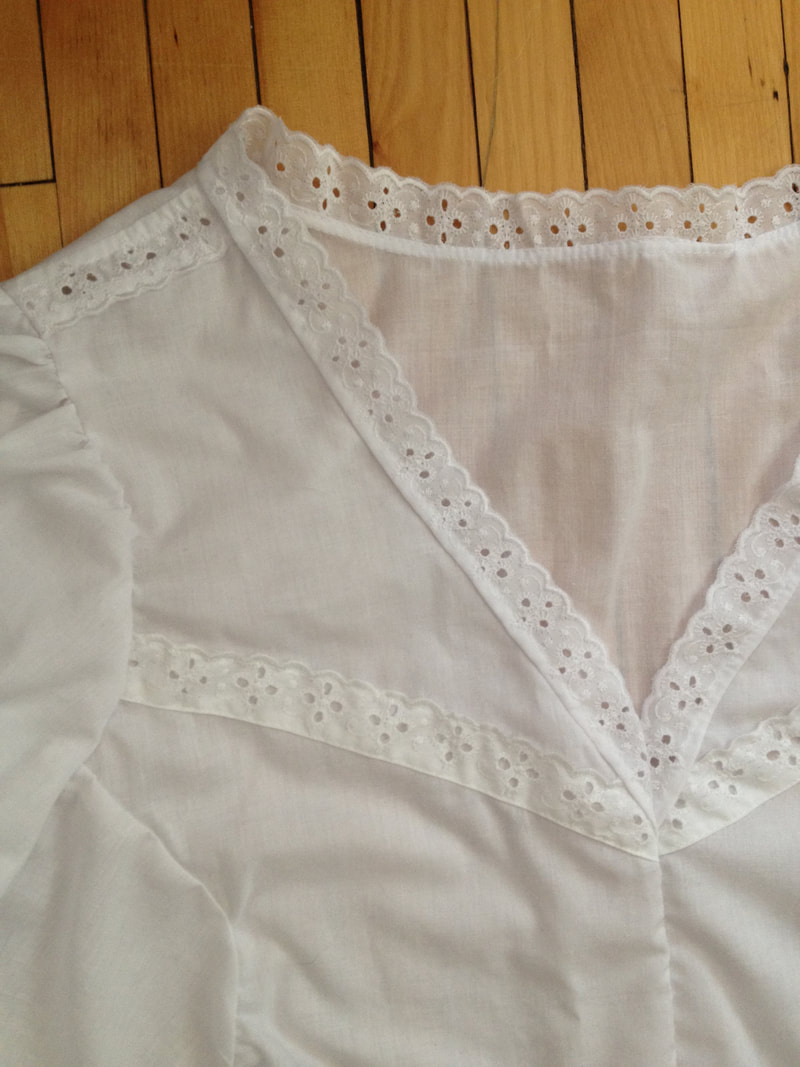
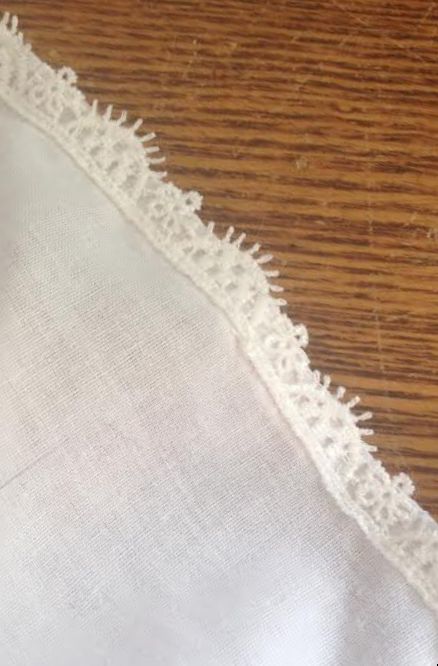
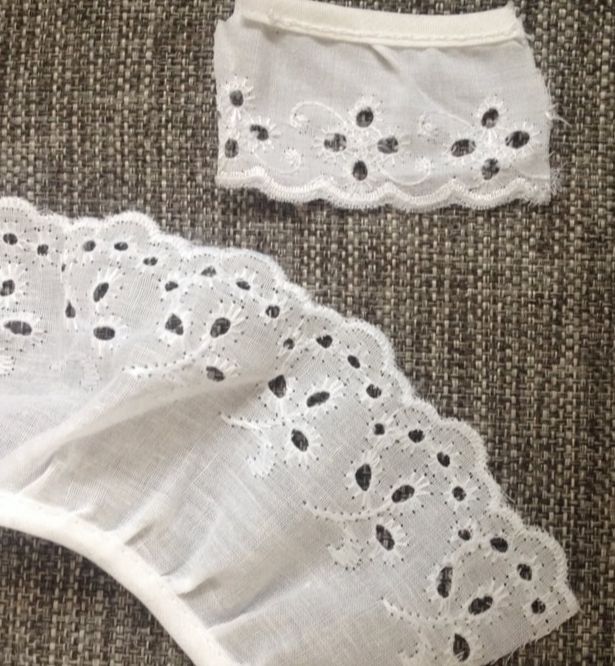 We decided to use a lightweight white cotton to keep the costume as breathable as we could, and I found a few different kinds of lace to match the embroidery patterns of the blouse as closely as possible. My goal was to incorporate the lace so that it looked like a part of the material. I designed the blouse so it would be fairly fitted to mid-chest, then flow down. This eliminated any need for closures, so it could just be pulled on over the head. Looking at the original blouse from different angles, I could see just glimpses of embroidery on the shoulders and across the bust, peeking out under the edges of the corset and in the armhole.
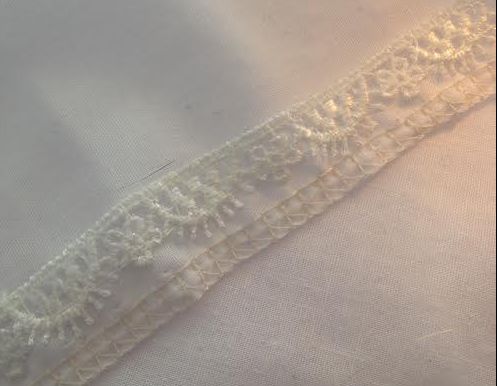
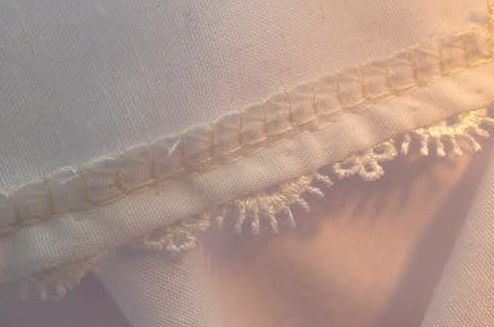
I used the lace on the neckline and sleeves to finish the raw edges and create a casing for the elastic on the sleeves. For both the blouse and petticoat, I used a serger on all the inside seams for a clean, lightweight finish. 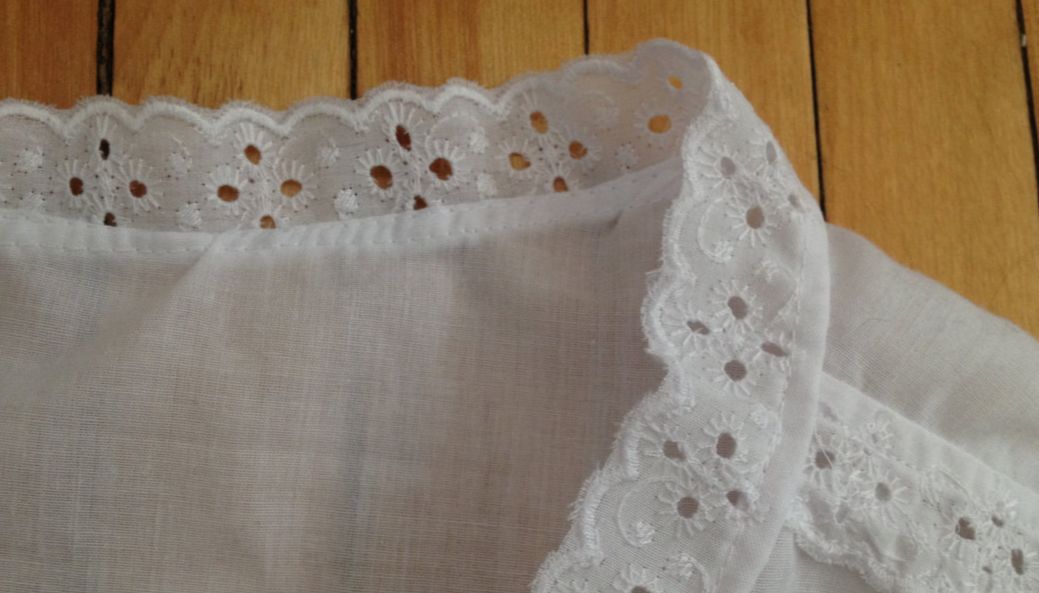
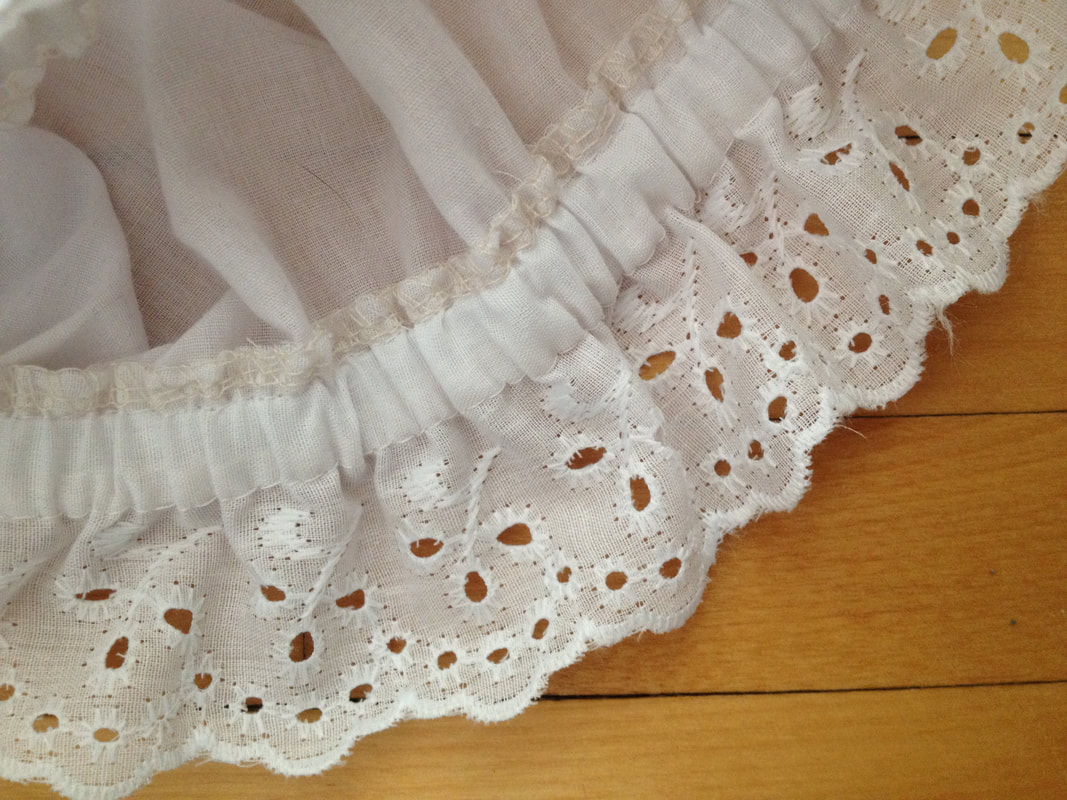
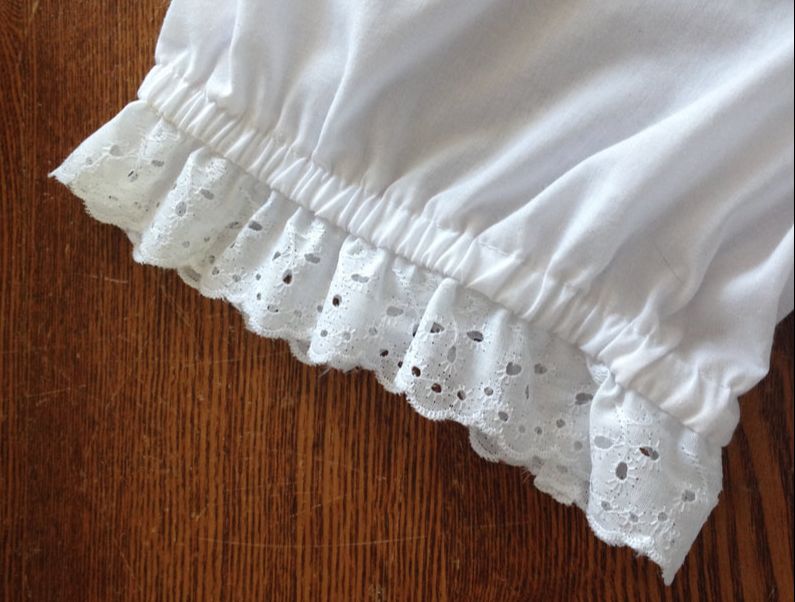
I also used lace to finish the petticoat hem: serging the raw edge of the material, sewing the narrow lace just above that, then turning up the serged edge. And a finished petticoat! The final pieces will be the corset and skirt. Blog post and finished pictures coming soon!
 Since finishing the winter dance costumes, I've been working on really exciting new project - a five piece cosplay of Belle from Once Upon a Time. The finished set will include her blue corset and skirt with blouse and petticoat and her teal and gold traveling cloak. This is a costume I've had some experience with, having worked on a handful of Belle's blue dress costumes, as well as a version of the traveling cloak. These pieces have some fun details that I don't often use in modern clothing, like boning the corset and hand pleating the skirt (more about that in my next post!)
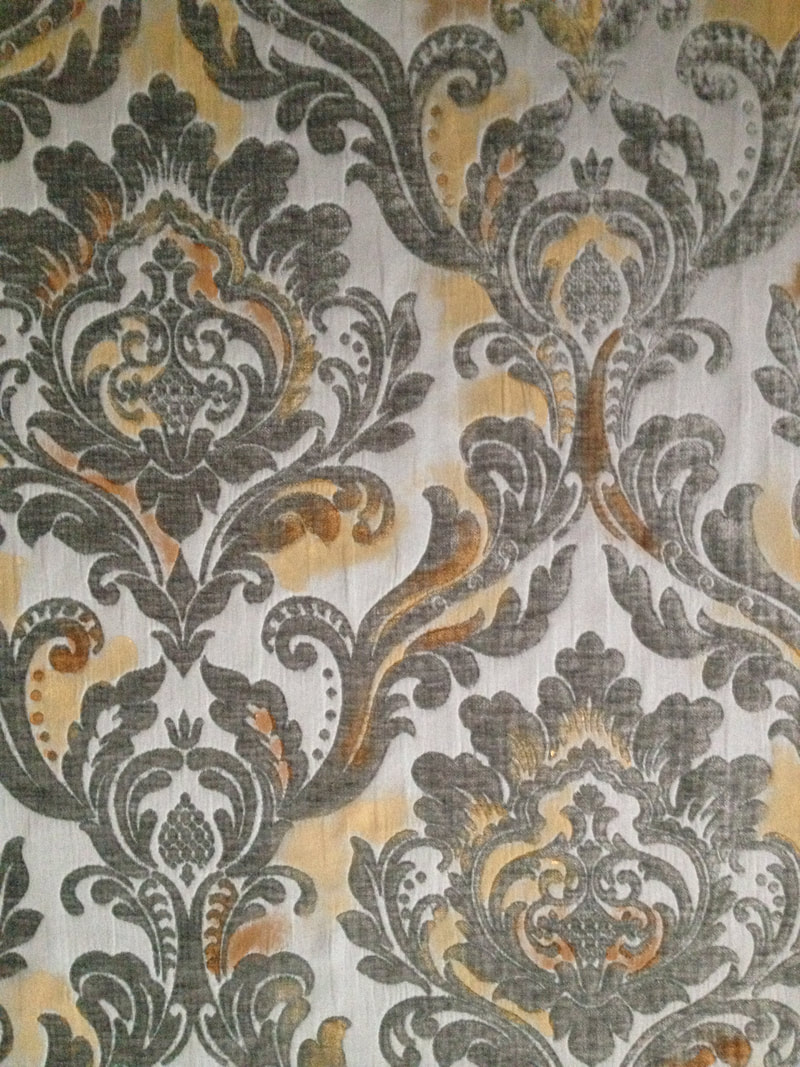
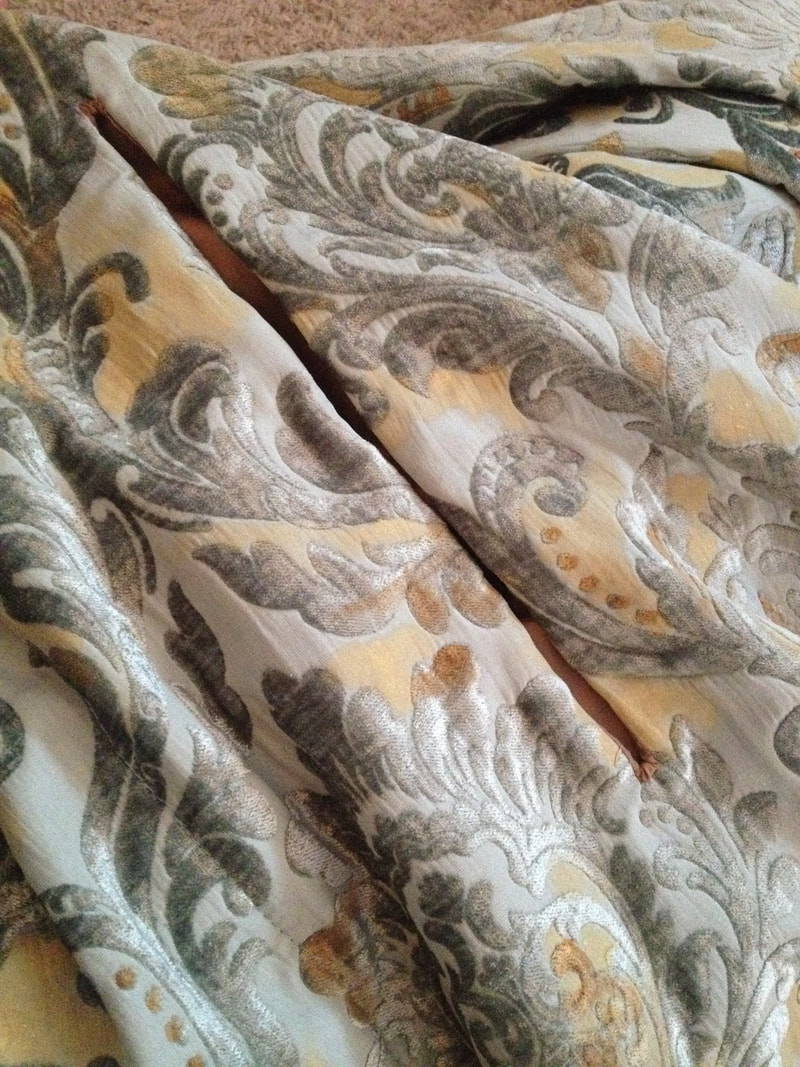
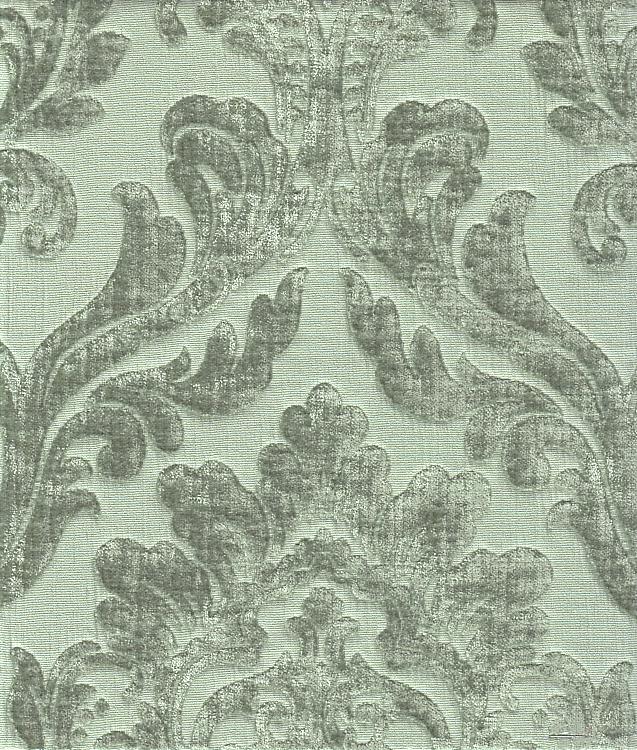 For this set, I started with the cloak. Besides the version of Belle's cloak I worked with, I also did some work on several versions of Ruby's red cloak, which takes a very similar process. I wasn't able to find an exact match for the cloak material, so my client and I decided to start with a base teal material and paint it with several shades of gold. You can still buy the material used on the show for Ruby's cloak here, a gorgeous double sided velvet damask, and I found that it also came in a teal color very close to Belle's cloak! The texture and weight of this material is great for a cloak - it drapes and moves well, and catches the light in really interesting ways. Then I came to painting, which was the most time consuming part of this process. I used two different shades of gold to add a little more depth. In Belles original cloak, the pattern is less symmetrical than in the material I used, and is very floral, so I used the paint to both highlight bits and pieces of the floral aspects of the damask pattern, and create more asymmetry. Six yards of material later, I was pretty happy with the result!
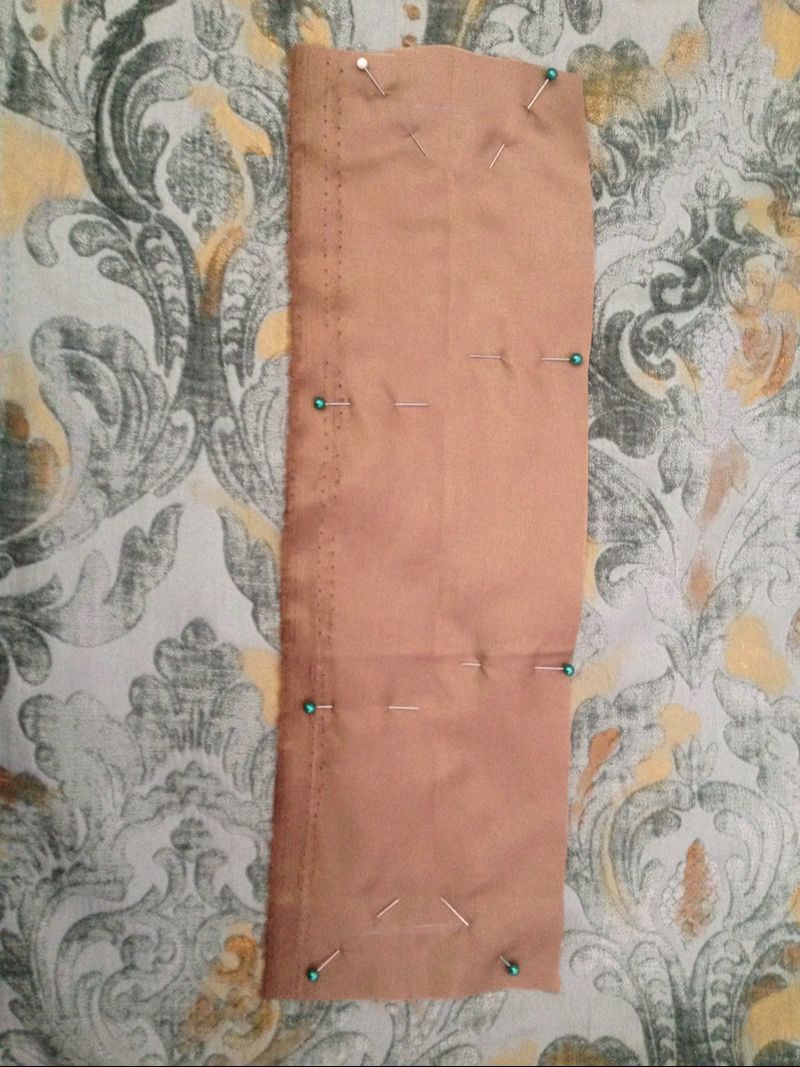
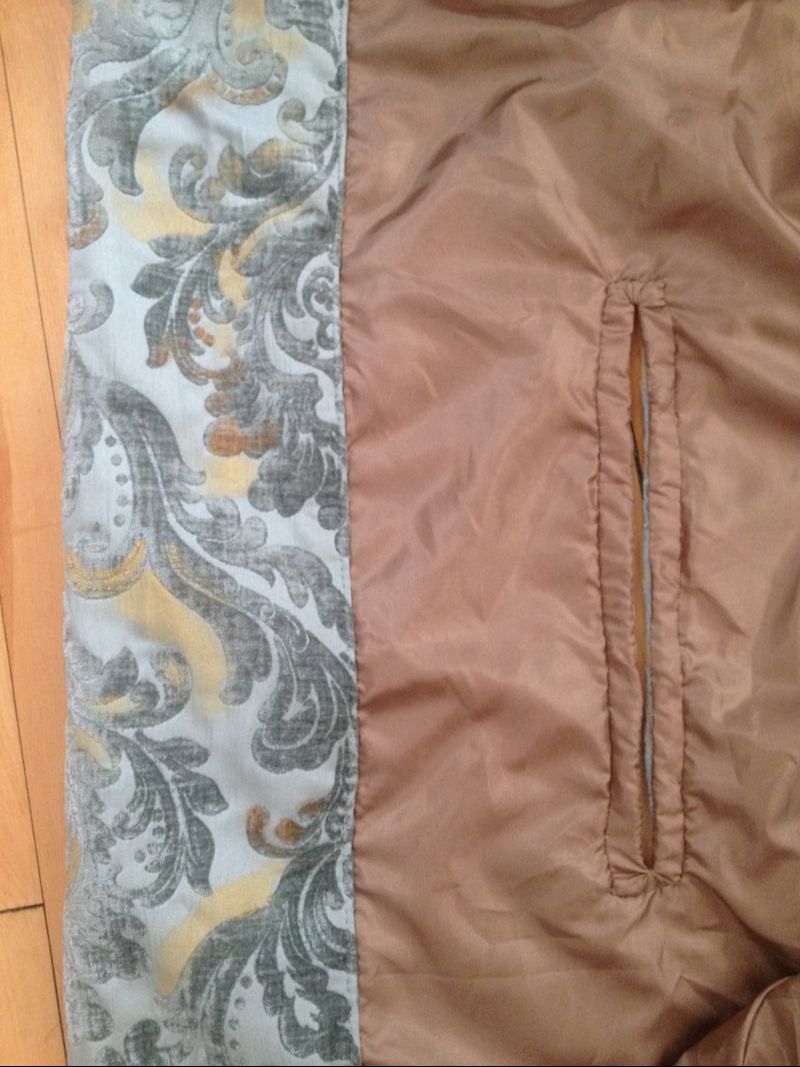
Once I finished painting the material, I started building the cloak and hood. The hood has a deep brim – lined with interfacing – that helps it stand out from the face. It was difficult to tell from pictures whether that separate piece continued down the front of the cloak, but it seemed like the pattern of the material continued uninterrupted to the edges, so I opted to create a deep hem down each side of the front instead. 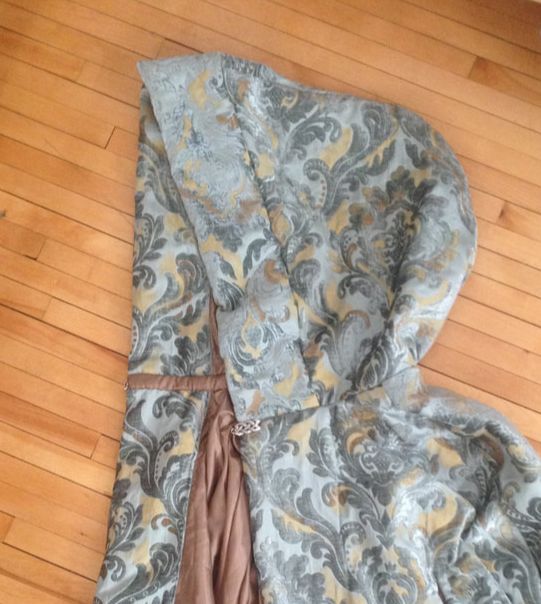 There's also a deep hem around the bottom of the cloak. Because the hem is slightly rounded, I gathered the edge of the damask just a bit to ease it into the lining. Because this material is so heavy, a normal running stitch would almost certainly break, so I used a trick I picked up from a good friend: zig zag stitch over a piece of dental floss and use the floss to gather the material. Works like a charm! 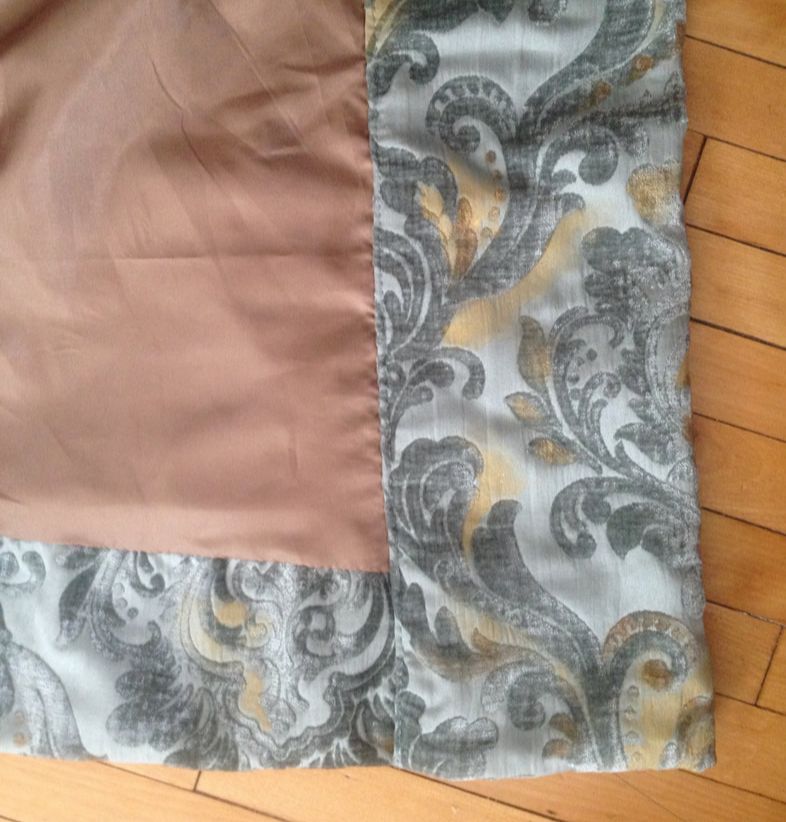 The final task was to create slits in the front of the cloak for arm holes. A great way to finish a slit like this and keep it almost invisible on the outside of the cloak is to use the same method you would for a bound buttonhole. First, I measured and marked my slits on the right side of the cloak, and pinned on a narrow strip of lining material. Next, I sewed a narrow box around the line for the slit, reinforced it with fray check for a little extra stability, and cut down the center through all the layers of fabric.
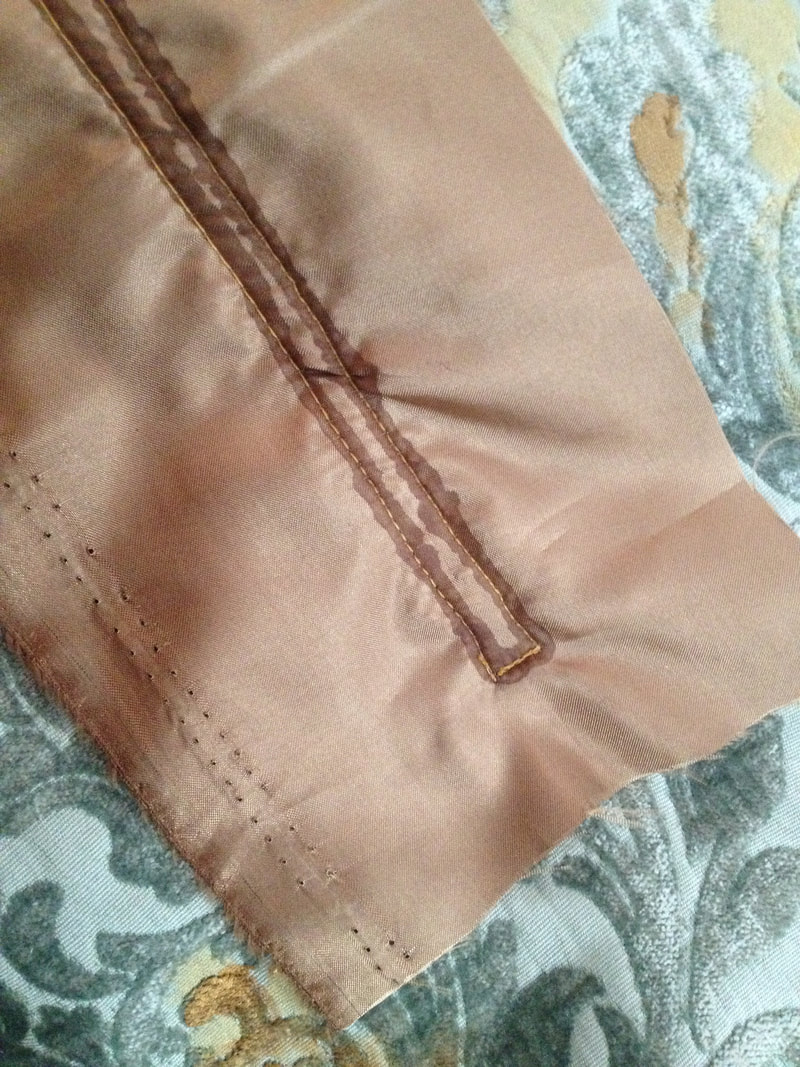
Finally, I urned the lining piece through the slit to the inside and hand stitched it down, leaving the almost invisible slit on the outside, neatly finished edges, and a narrow band inside. This is a process I've used quite a bit in my sewing. I really don't like making traditional buttonholes, or really like the way they look finished. So even though this process is a bit fussier and more time consuming, I'm always much happier with the finished product!
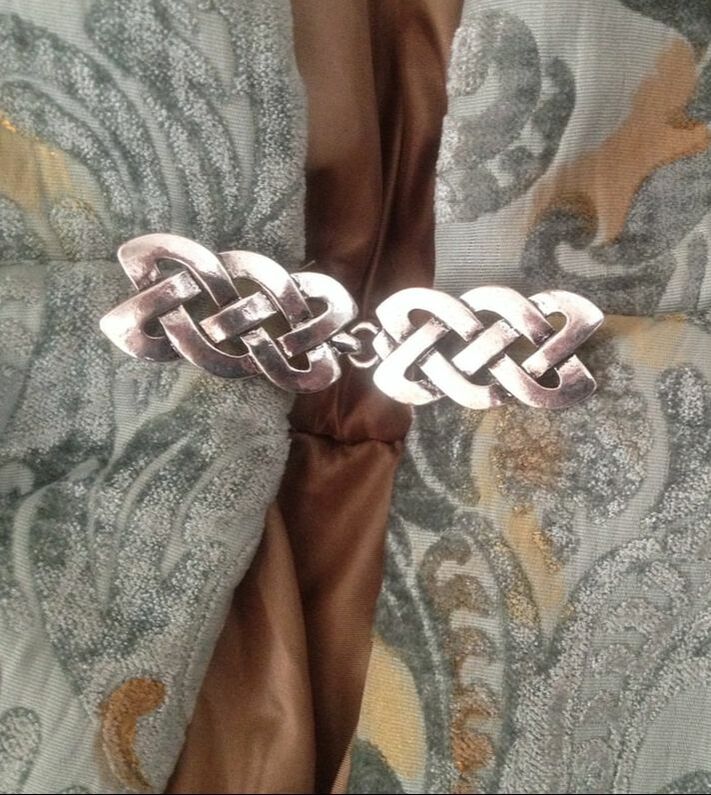
The last step for the cloak was to finish the inside of the neck seam and add the clasp. Most of the pictures I found of the cloak had been color adjusted, and I've seen versions of this cloak made with both silver and gold Celtic knot clasps. Going through the original episode, I was fairly sure it was silver, and I found this clasp that looks identical to the one used on the original cloak.
And the first piece is finished! I'm so excited to see the whole ensemble together!
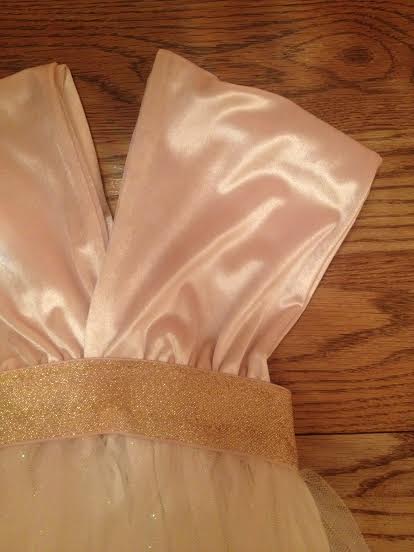
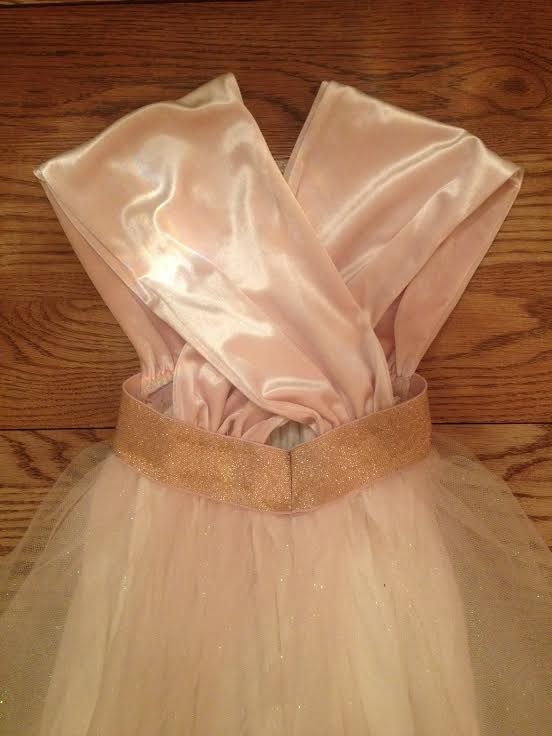
Every year, I have the opportunity to costume performances for Fusion Dance Academy. Sewing for children has always been one of my favorites, and sewing for these dancers is no exception. I always know I got it right when a young girl will slip into her dress and start twirling across the floor, or break into a smile and say, I feel so beautiful! After five years of working with them, I also really enjoy the relationships I've built with the studio and some of the dancers. Instead of starting from scratch like I do with a new project, I get to build on what we've already done for each new season, and expand and grow with the studio. This year, I was designing for three different age groups. The whole studio participates in their performance at the end of the year, with different dances that create a unified story, so it's important that the costumes also have a unified look. We wanted to make sure that they were age appropriate, and bit unique for each class. Since I'm usually building between 20 and 40 costumes, it's also important that they're relatively simple to construct, and will look good on a variety of girls. I started off with the littlest class, 3-4 year olds. One of our building blocks that stays the same each year with just a few tweaks is my tutu pattern for this group. This year, we're using pink, gold, and rose gold for the costumes. It was this rose gold elastic we found that sparked inspiration for the rest of the color scheme! And of course, a matching petite pouf for each girl's hair. 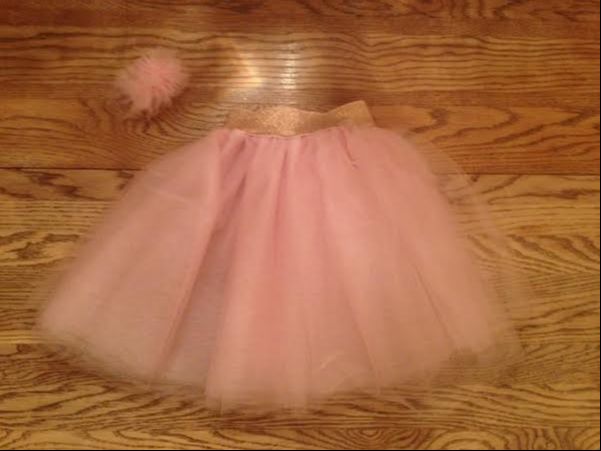 For the next class up - the five year olds - we wanted to stick with tutus, but dress them up a little bit, and give them a little more length. I added a layered effect with ivory netting underneath and pink tulle on top, which gives the colors a little more movement and depth when they're dancing. One interesting part of designing costumes is remembering how they look on stage as well as up close. Stage lighting can transform colors and textures, and details should be seen from a greater distance. And of course some extra sparkle never hurts! 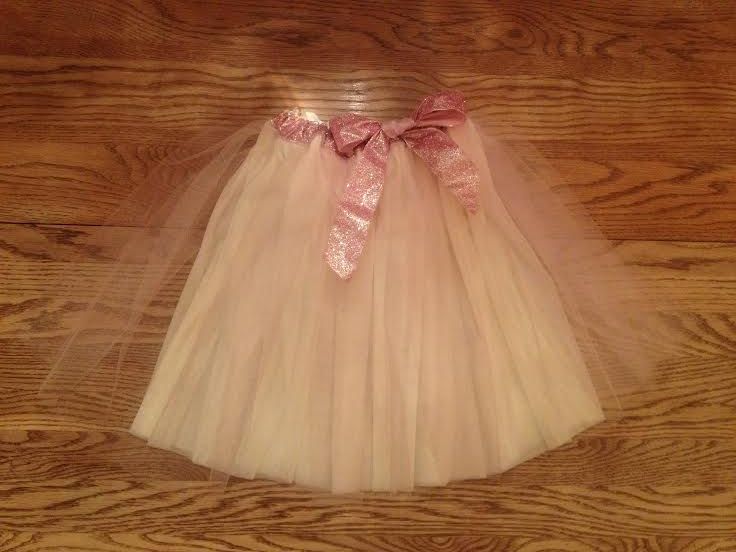 For the oldest girls, I designed a full dress instead of simply a skirt. Building dance wear requires attention to different details than everyday clothing. Although is only worn in performance a few times, it has to stand up to pretty heavy wear during that time. It also has to move with the dancers in more extreme ways and be able to stretch without moving around too much on their bodies. My favorite part of these dresses is the material we found for the bodice, a light rose colored stretch velour, sturdy, stretchy, and comfortable. The layered skirts and shimmery material will catch the lights as they dance! 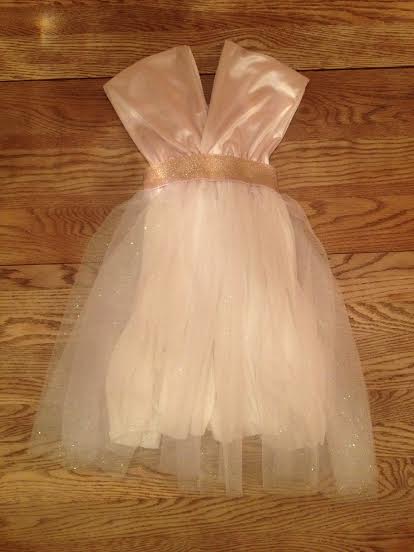
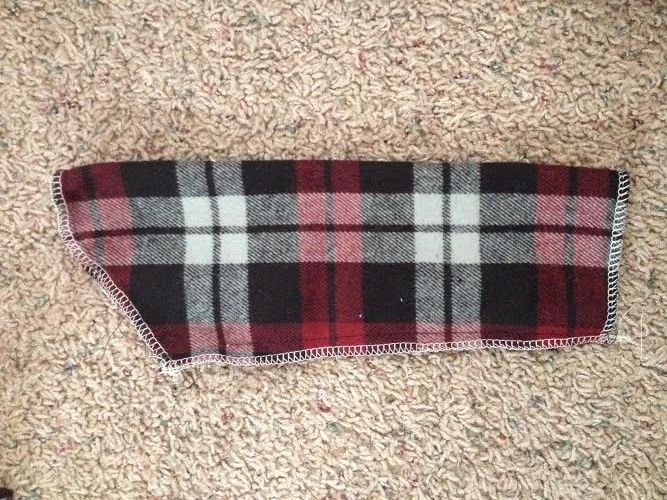
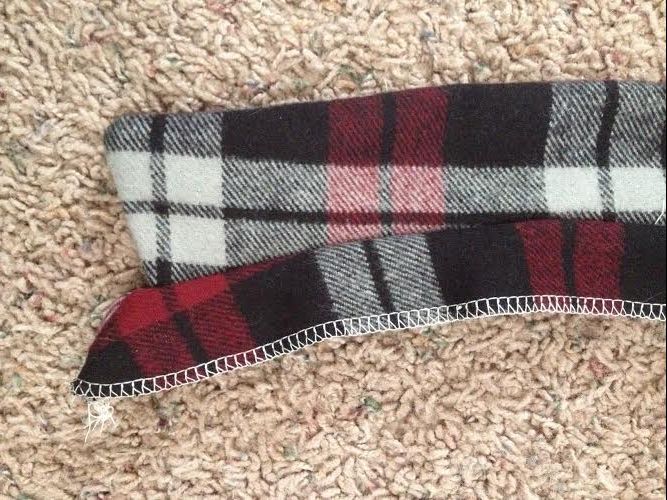
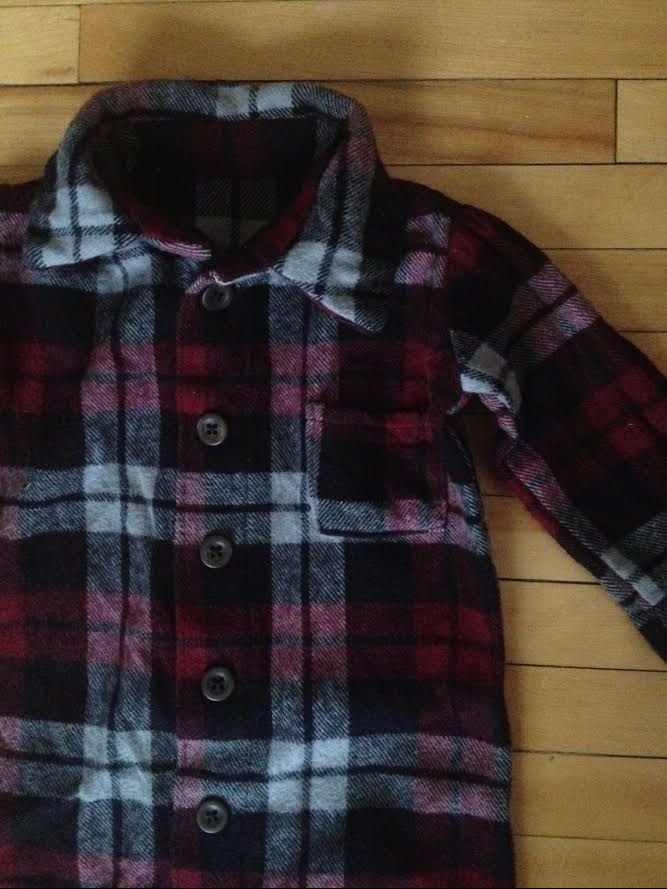
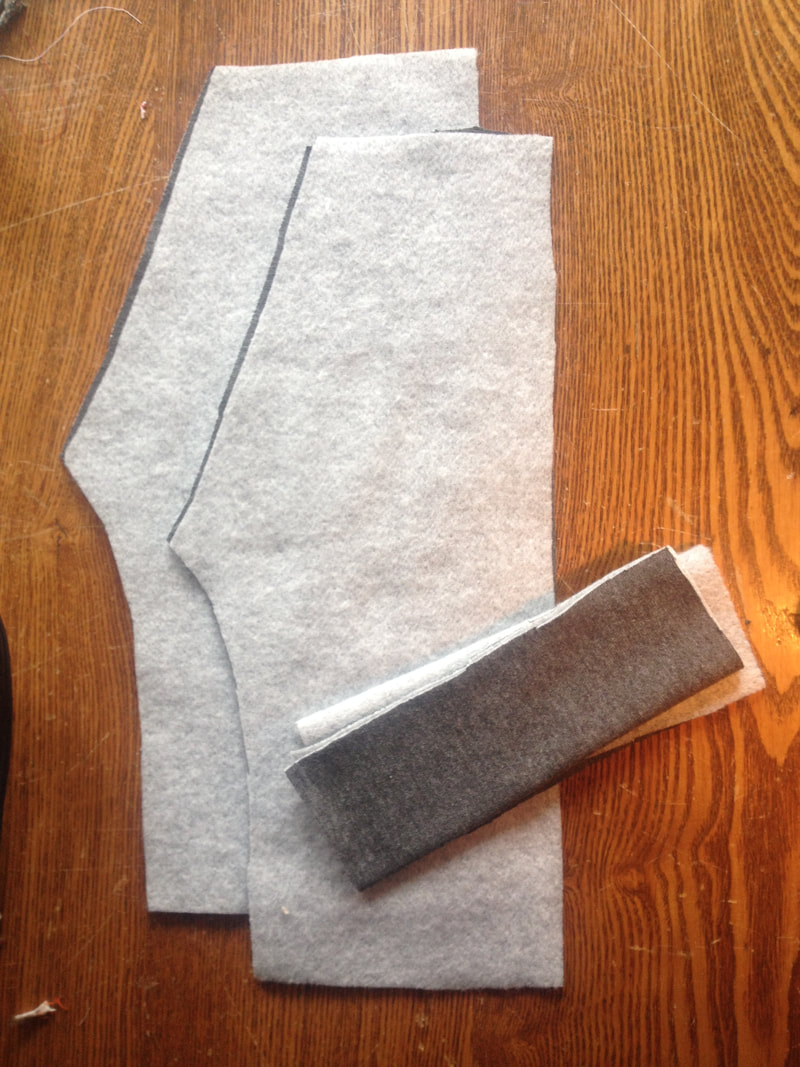
More baby swag! This is a project I've been wanting to design for most of this year, and I finally got the chance. The super soft, think flannel is perfect for keeping baby cozy in the Minnesota winter, and little details like the collar and reinforced cuffs give it a little extra class. It turned out to be the perfect piece for a less traditional baby dedication! 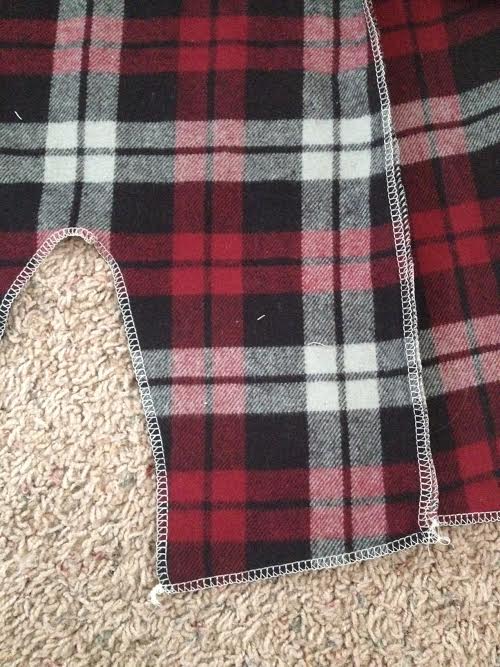 I wanted to match the plaid pattern as much as I could while laying out the pieces, although I didn't have a very large piece of material to work with. I decided to match the horizontal lines, since that way, there were the fewest curved edges to work around. Once I had my pieces cut out - again, based on parts of several articles I already owned - I serged all the edges to make finishing the inside easier and add a little more stability. Then on to construction! First were the main body seams and preparing the sleeves, collar, and pocket. I wanted to add as many details of "grown up" clothing as I could while still making it as baby friendly and easy to wear as possible. I added a short running seam on the top of each sleeve to ease them into the shoulders, and sewed the collar into the neck, ready to be attached to the body.
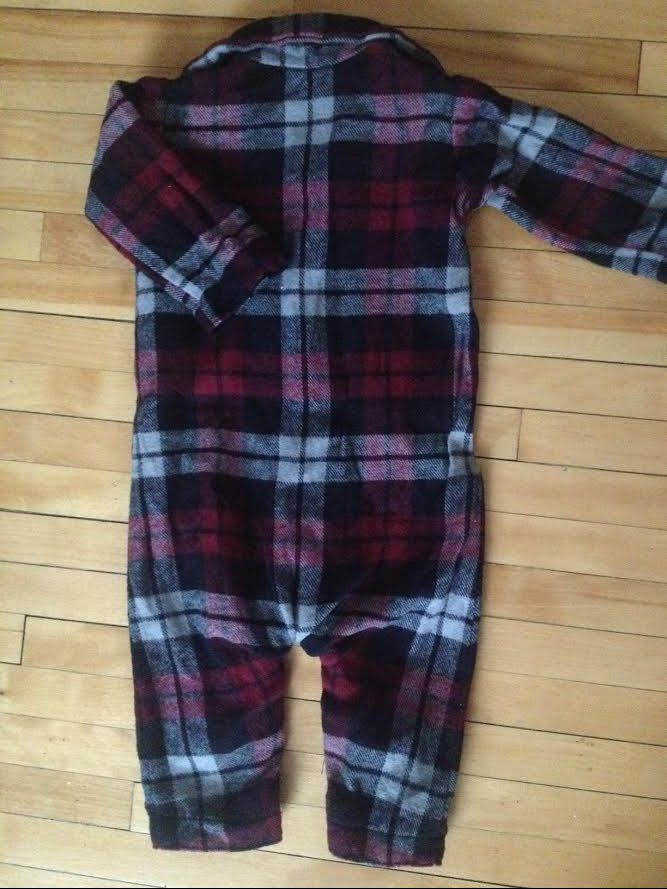
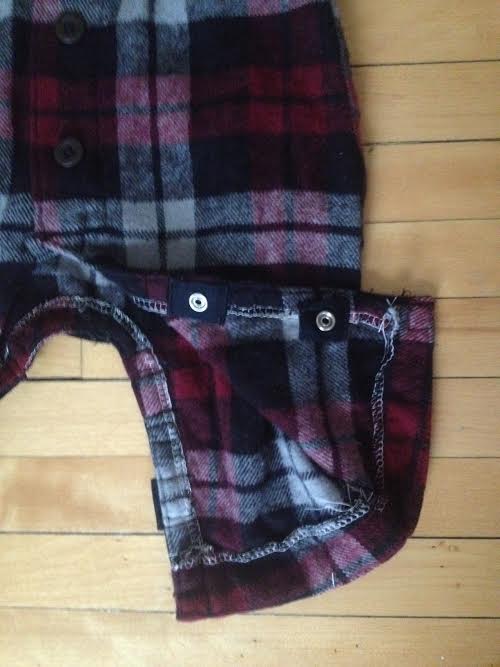 I think the trickiest part of baby clothing is the closures. It's of course very important to get it on and off easily, both from the top and the bottom, with easy to use closures that will also stand up to an active baby. For most of the front buttons, I simply sewed shut the button placket with the buttons on top, with a snap under the top button to leave a little more room for the head. I finished the bottom with snaps sewn onto the reinforced inner leg seams, with magnets at the ankles for extra ease. And we have a completed project - and a well dressed baby! 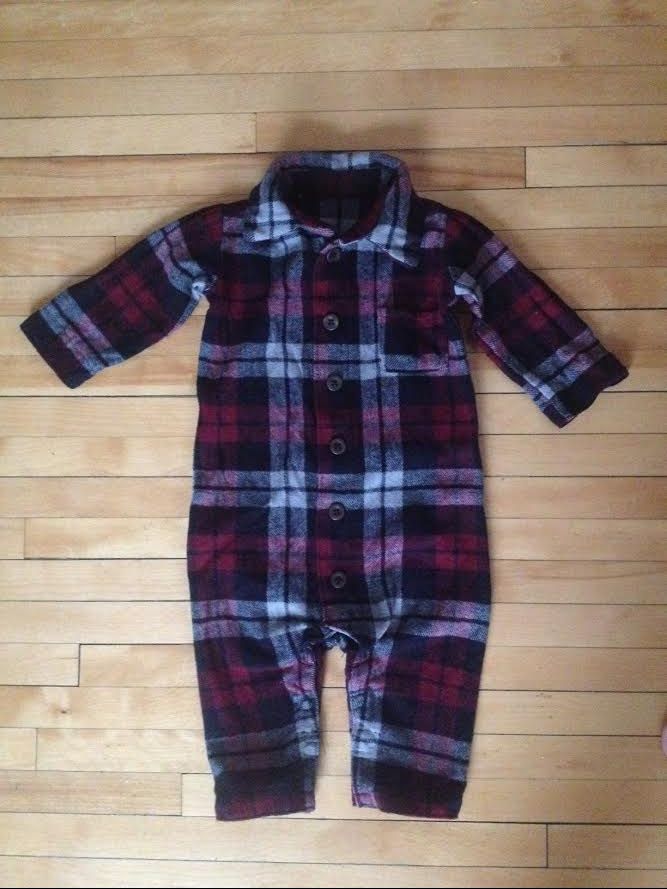
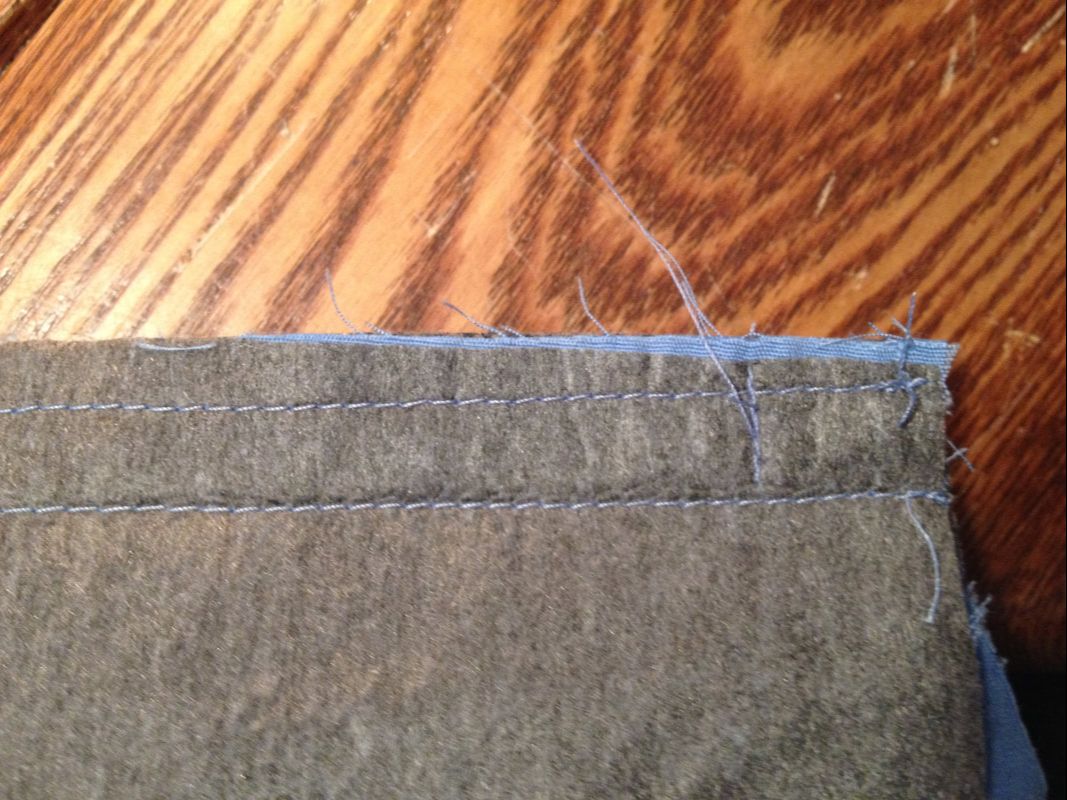
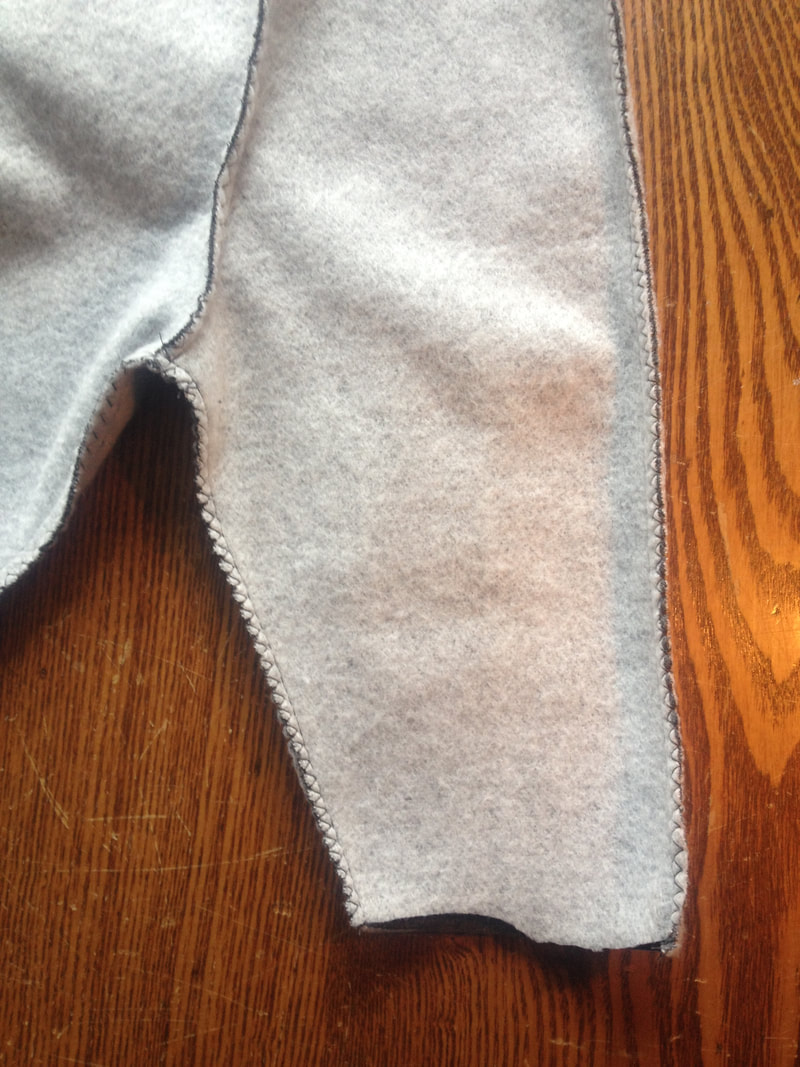
Some of my favorite projects have been the special occasion baby and kids' clothing I've gotten to create, like these dedication outfits made from Grandmother's wedding dress - here and here - and this sweet dress for family pictures. My fun project this week is two pairs of baby joggers - a little more casual than some of my other projects, but practical and so very cute! I'm patterning my pants after two pairs of joggers I already owned in the sizes I wanted to create. My pieces for the first pair are cut out - legs and cuffs. The waistband for each pair is created by folding over the top of the pants. Inside seams are straightstitched and then reinforced with zig-zag stitch for a clean, sturdy finish.
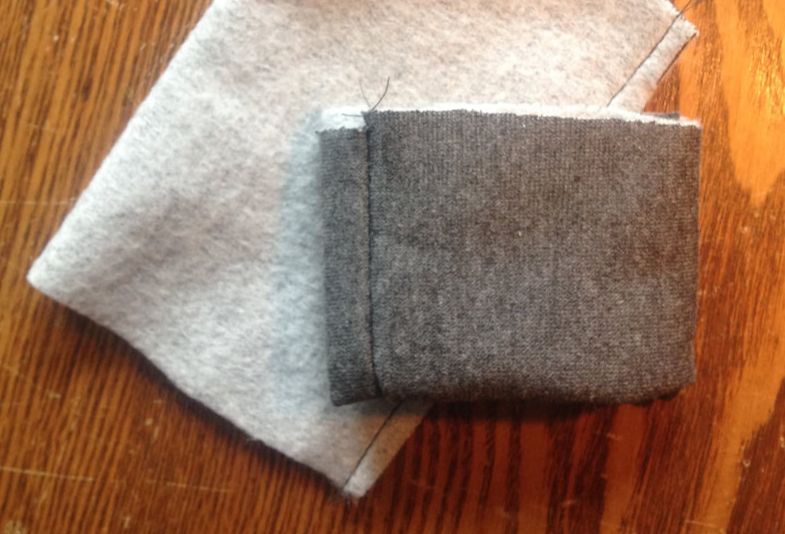
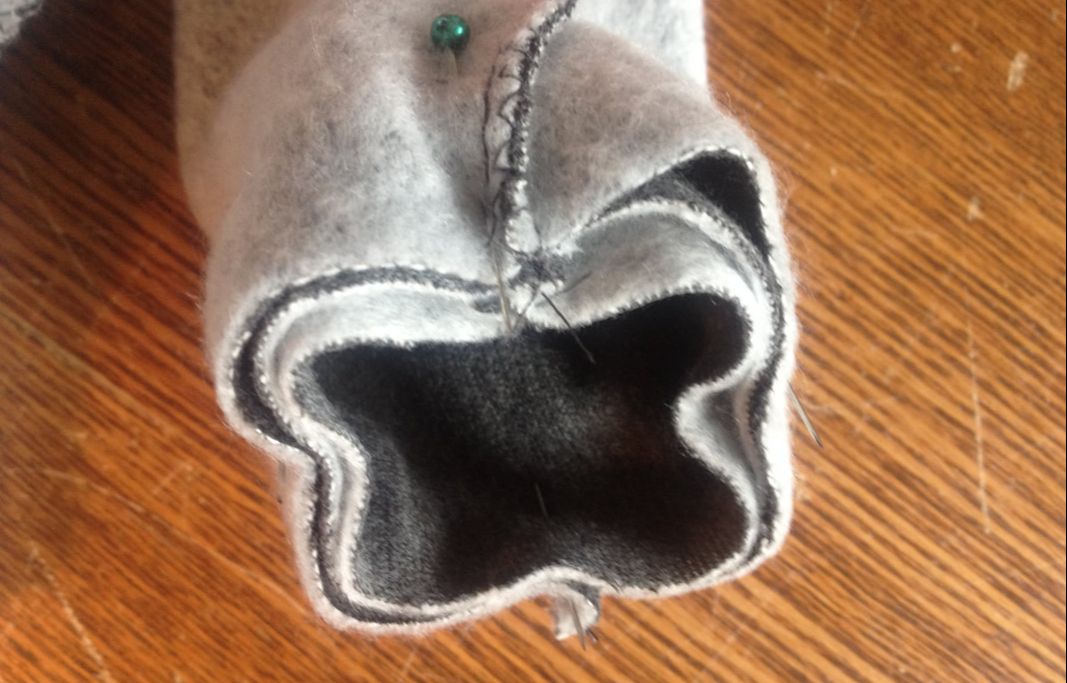
The waistband is folded over with a narrow hem tucked under to create a casing for the elastic, and stitched closed once the elastic is pulled through the casing. 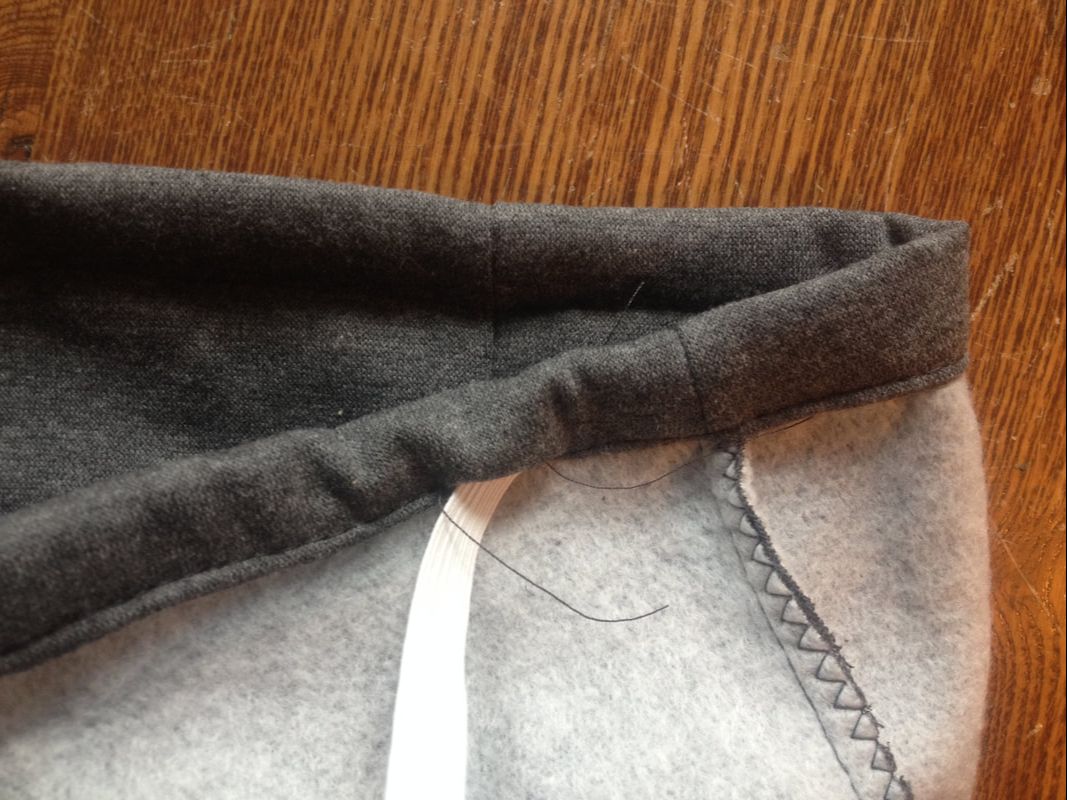 The cuff pieces are sewn, folded, and pinned into the bottom of the legs. On one pair, I used a running stitch around the bottom of the leg to ease it into the slightly smaller cuff. For this pair, I simply ease the leg into the cuff as I sew it together.
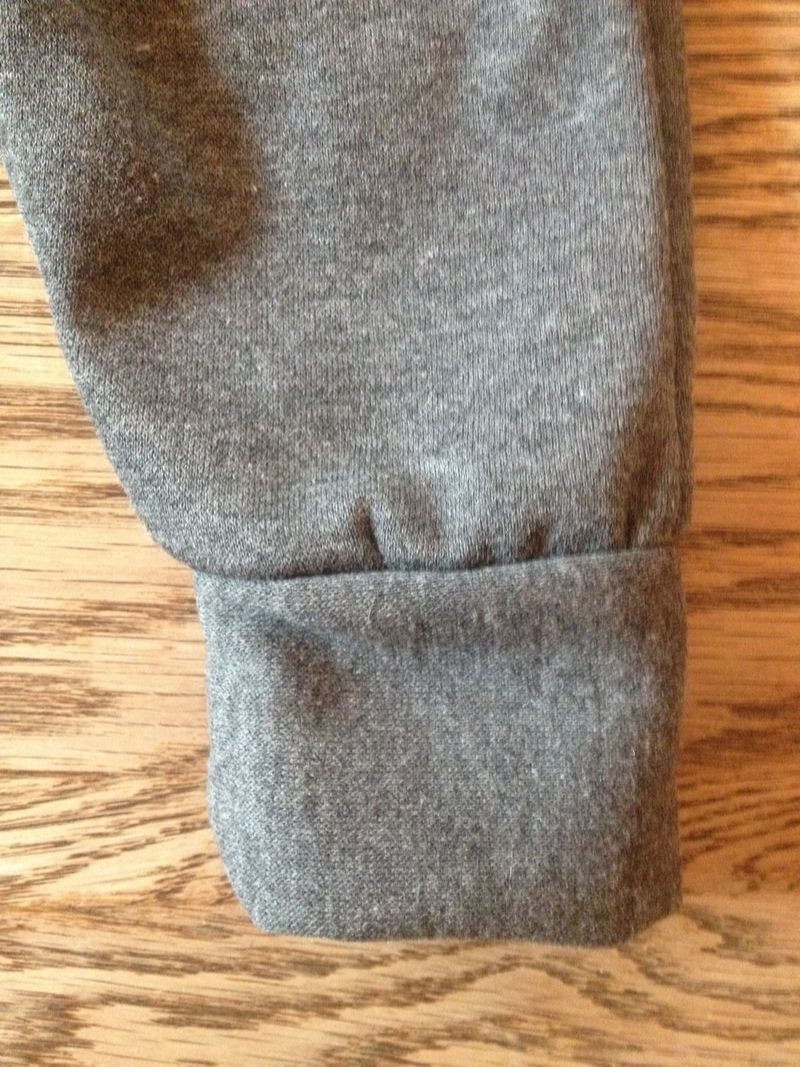
And baby joggers are complete! This is a super versatile pattern and project - you could make it out of a variety of materials, adjust the cuffs and waistband for different looks, even add pockets or a drawstring. For my second pair, I eliminated the center seam and dropped the center down just a bit for a unique touch. A quick and fun project to pull together between some of my larger commissions this winter!  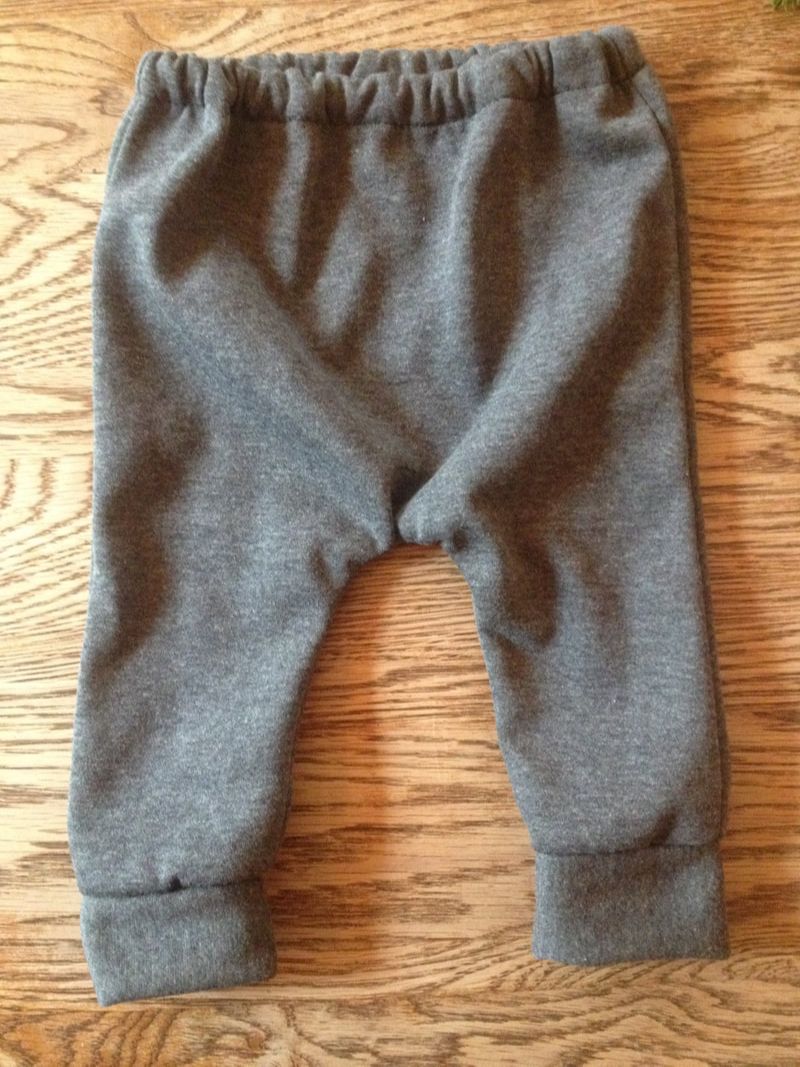 |
Design BlogThis is the place to find projects in process and get a glimpse inside of my work. Archives
December 2020
Categories
All
|


 RSS Feed
