|
I absolutely adored Lupita Nyong'o's gorgeous blue dress from the Oscars (like so many others). So when I came across a deep blue chiffon in - you guessed it - the S.R. Harris remnant bin, I decided to design a version of my own. 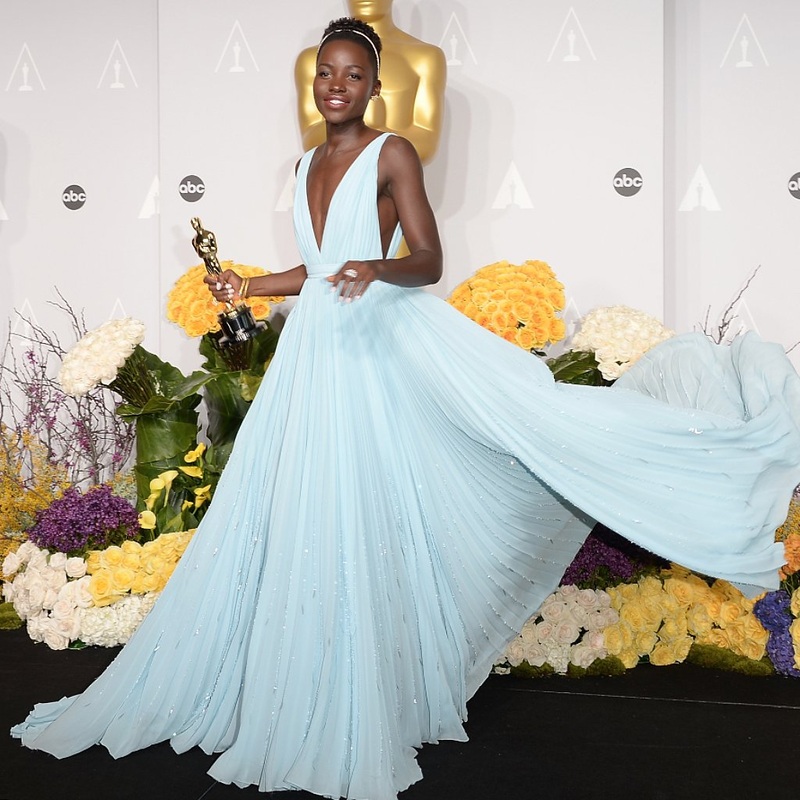
I take no credit for this photo.
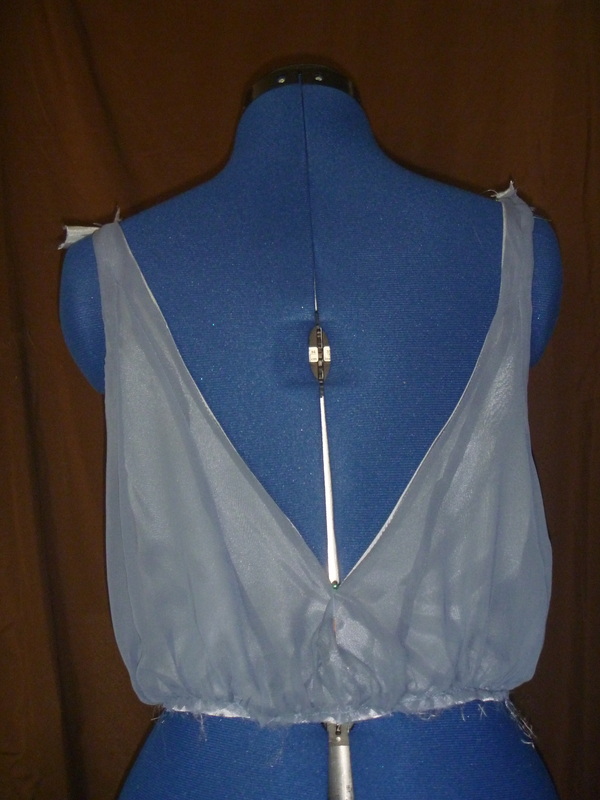
Mine would be a darker blue, as that is more flattering with my complexion, a little bit more covering in the bodice, and just around knee length. Unfortunately, I don't have many occasions to wear floor length gowns. I'm also going to skip the beading that trails down the skirt, again, to make it a little more casual. 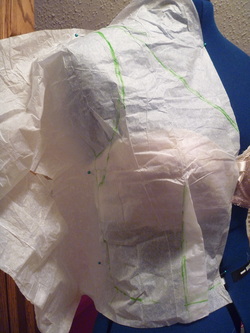 First step was to create a basic pattern for the bodice. I tried a technique I hadn't before, draping light tissue paper directly onto the dress form to draft the pattern. Here you can see the front piece. The lining will be fitted, and the chiffon overlay will be expanded along the waistline to create the gathering, with a little bit "blousier" of an effect than the original. Once everything was cut out, I took in the darts, sewed the front and back pieces together, and gathered the waistline of the chiffon. Finally, I attached the side and shoulders. Besides any finishing tucks and installing the zipper, the bodice is done! (Pictured here before the shoulders were finished.) As you can see, using a lighter shade of lining creates a shimmery finish.
Next steps are to french seam the skirt gores and finish the waistband. Part 2 coming soon!
0 Comments
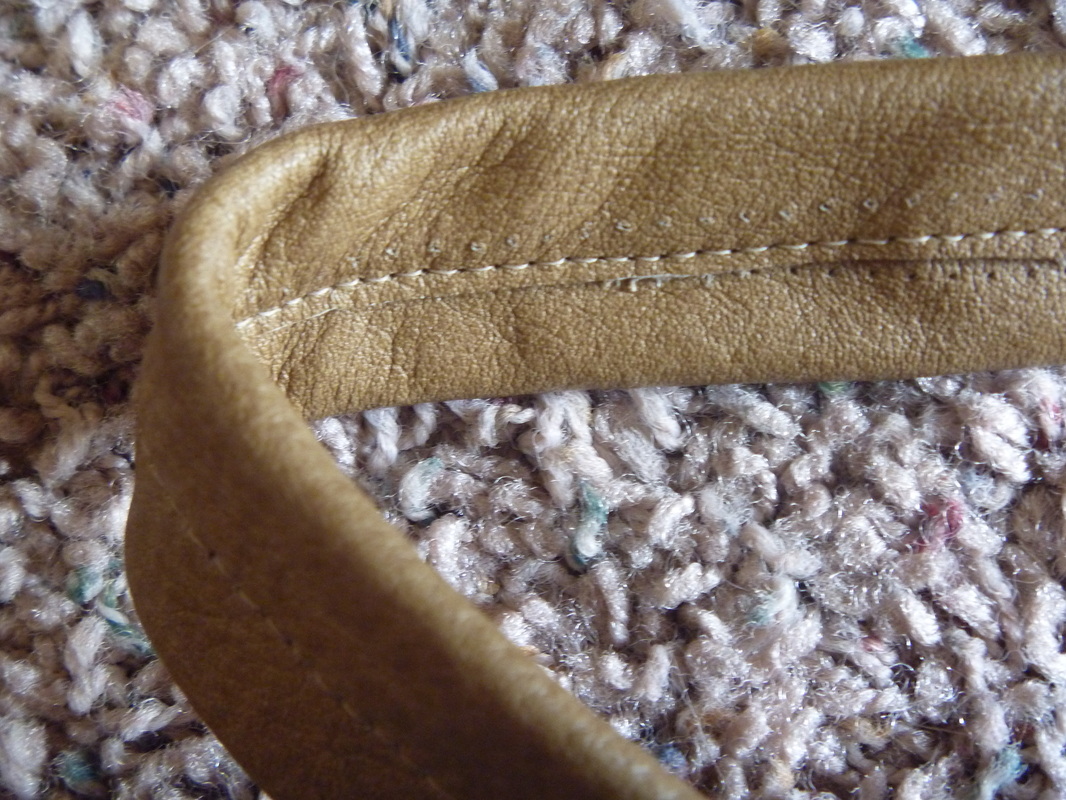
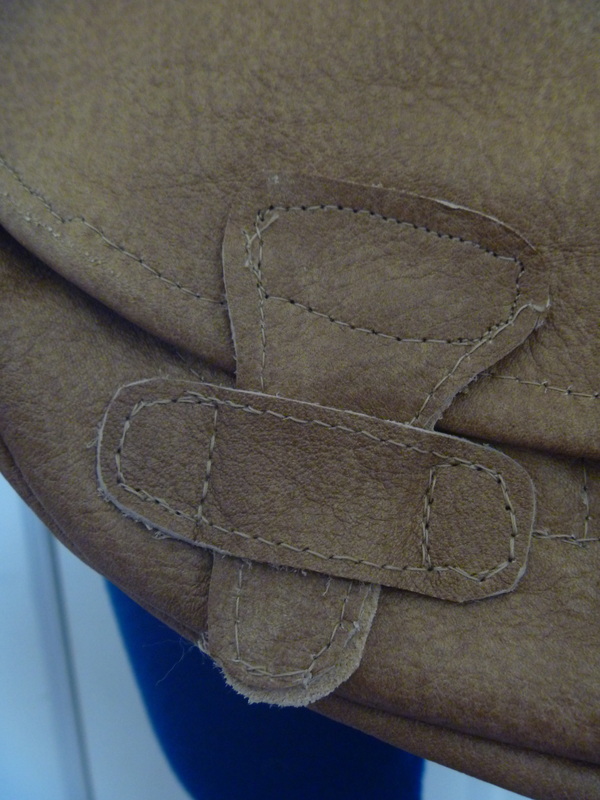
Remember this guy? If you haven't seen Part 1, check it out here. It's finally finished! And I'm so happy with the result. 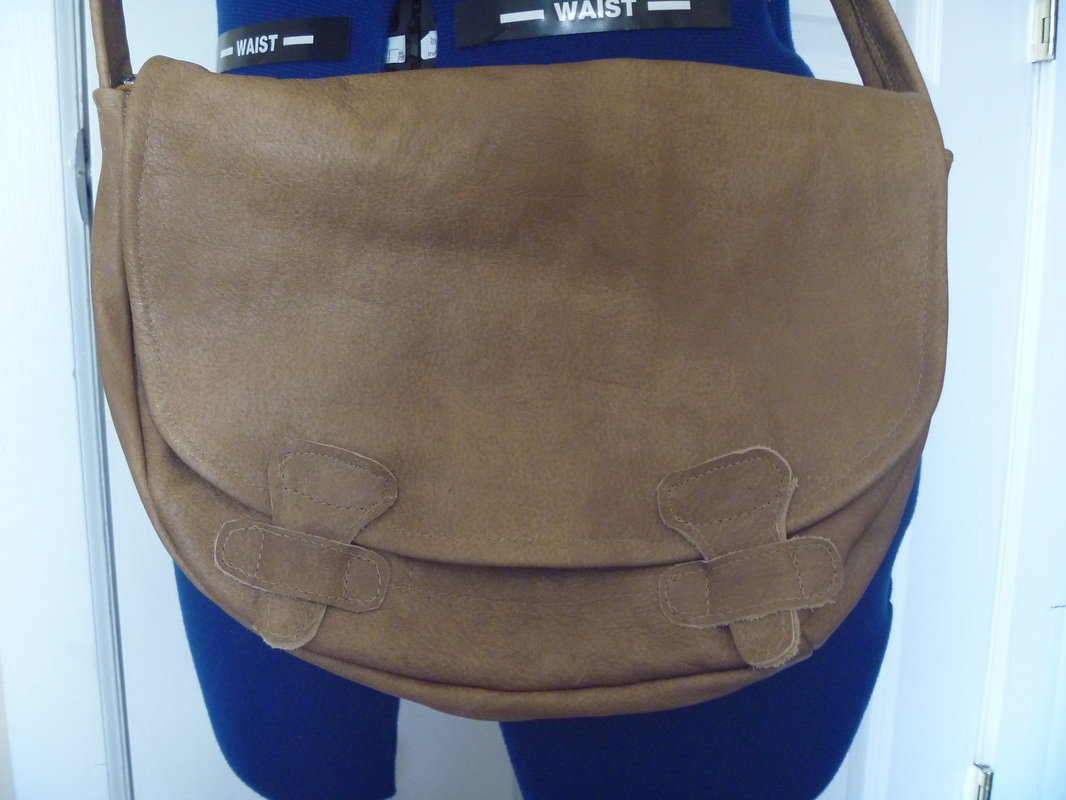 You might notice that it looks a little different than it did at the beginning - namely, there's a different kind of thread. Besides patience, another absolute necessity in successful sewing is being willing to admit a mistake and go back and do it again, and sometimes again and again and again. Seam rippers are very handy tools. Never was this more true than on this satchel. I started out stitching the body of the bag by hand, using a saddle stitch and heavy contrasting thread. That looks like this: 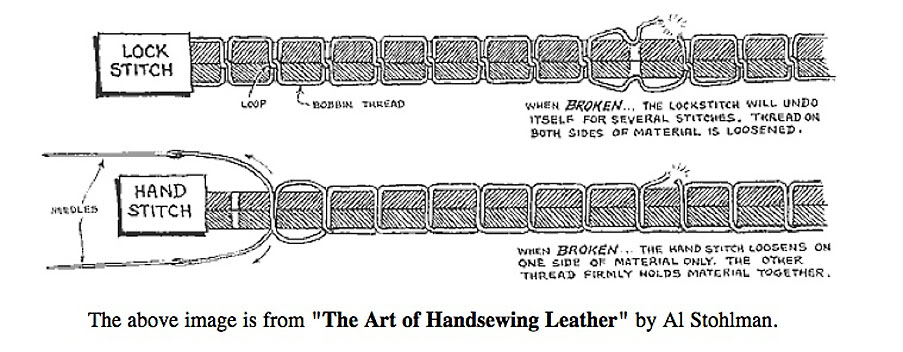 I was so excited about this, because like it states above, it's sturdier and gives a really nice look on leather items. However. After a number of hours of this, I took a mental step back to check it out. And I didn't really like it. On top of that, I couldn't figure out how to best stitch the long strap seams since originally, I didn't want to topstitch at all on the bag exterior. And then I made a discovery: this leather was indeed stitch-able on my machine. (It's more supple than many leathers, and I used an extra heavy weight needle.) So after several weeks - yes, weeks - of consideration, I decided to take everything apart and re-stitch it all with a matching thread on my machine.
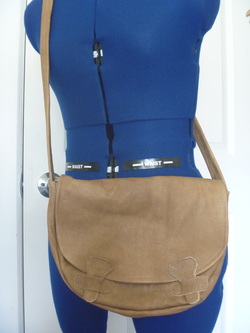 The perfect size for what I need, with a top zip closure and crossbody strap, so it's easy to bike or walk with. It make me excited to start traveling! No, it's not perfect, and some of the original hand sewing holes are visible. But for my first attempt at working with leather, I'm very excited about the result!
|
Design BlogThis is the place to find projects in process and get a glimpse inside of my work. Archives
December 2020
Categories
All
|

 RSS Feed
